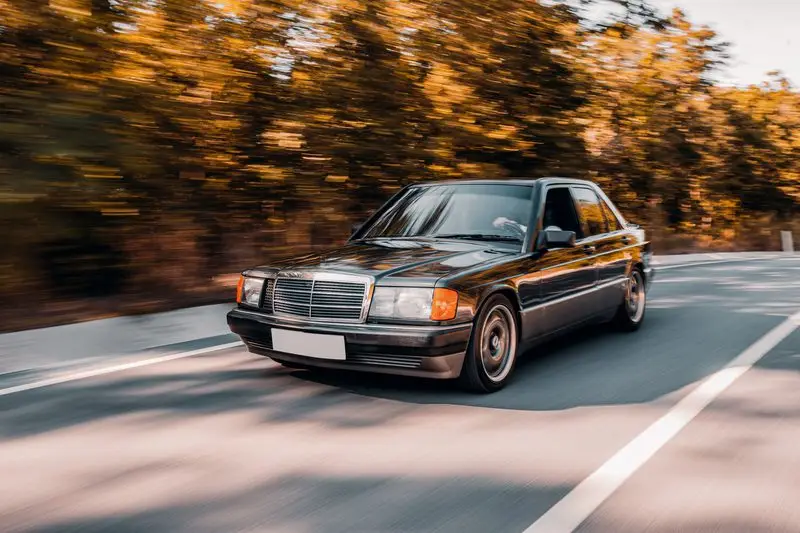
Discover the best way to edit car photos Lightroom Classic (8 Steps)

Discover the best way to edit car photos Lightroom Classic! Learn pro tips, export settings, and creative effects for stunning car shots.
9 Best App for Car Photo Editing to Transform Your Shots

Searching for the best app for car photo editing apps? Check this list of super easy to use apps!
How to Edit Car Photos on iPhone Like a Pro! (5 Easy Steps)

Want to know how to edit car photos on iPhone like a pro? If you’re into cars then you know how important it is to capture them at their best. If you’re a car enthusiast showing off your ride, a seller looking to impress buyers, or a photographer building your portfolio then well-edited car photos make all the difference. But you don’t need fancy equipment or expensive software to make your car photos shine. You have everything you need to turn an ordinary car photo into a masterpiece with an iPhone in your pocket. Apple’s built-in editing tools and some fantastic third-party apps can make professional-quality edits smooth. In this post, I’ll walk you through everything: from prepping your photos to using iPhone tools and apps for stunning results. By the end of this guide, you’ll know how to: Let’s dive in and start editing those car photos like a pro! Why Edit Car Photos on an iPhone? IPhones are a game-changer when it comes to editing car photos. Here’s why: 1. Convenience and Accessibility Your iPhone is always with you, ready to capture and edit photos in seconds. No need for bulky cameras or computers. Also, the iPhone’s built-in tools offer everything from cropping to advanced color adjustments. You can instantly edit car pictures on your iPhone and share them wherever you want. 2. Professional Results Without Expensive Gear DSLR and paid editing software are gone. You don’t need them for high-quality results. Iphones are equipped with cutting-edge photo editing features that rival professional setups. Apps like Adobe Lightroom Mobile or Snapseed add even more options. It also makes it easy to edit car photos for a polished look. 3. Social Media Ready IPhone editing tools make it easy to tweak colors, adjust brightness, and even apply filters that are perfect for social media. Essential Preparation Before Editing Car Photos Editing starts long before you touch the editing tools. Preparing your photos properly is key to achieving great results. 1. Choosing the Right Photo Check out this video on car photography basics for tips on capturing stunning car photos: 2. Setting Up Your Editing Space 3. Save an Original Copy Always duplicate the image before you begin editing. You’ll have the original photo in case you want to start over or compare results this way. To duplicate an image on an iPhone: Now that you’ve got your car photo ready, it’s time to start editing! In the next section, I’ll show you a step-by-step guide on how to edit car photos on an iPhone using the built-in tools. Get ready to see the magic happen! How to Edit Car Photos on iPhone Using Built-in Tools Step-by-Step Editing car photos on your iPhone is easier than you think! Apple’s built-in photo editor is packed with features to make your car photos look polished and professional. Let’s go step by step to bring out the best in your car pictures. Open the Photo App’s Editor Start by opening your iPhone’s Photos app and selecting the car photo you want to edit. Then tap the “Edit” button in the top-right corner to access the editor. The interface is user-friendly, with options for adjustments, filters, and cropping right at your fingertips. If this is your first time editing, don’t worry. I’ll guide you through every tool you need to know to get amazing results. Step 1: Adjust Exposure and Brightness on iPhone The first thing I do is adjust the Exposure to make the photo brighter and highlight the details. On your iPhone: Tweak the Brightness once you’re happy with the exposure. This step ensures your car stands out without looking overexposed. Small adjustments here go a long way! Pro Tip: If the car is in shadow then slightly increasing the brightness will help make it more visible. Step 2: Play with Contrast and Highlights Next, I adjust the Contrast to make the details pop. Increasing contrast helps emphasize the edges and lines of the car. It also gives it a sharp and vibrant look. After that, I focus on the Highlights. Reducing highlights can also help recover details in bright areas. Such as reflections on the car or the sky. Step 3: Adjust Shadows and Black Levels To give the photo depth you can adjust the Shadows. This tool brightens dark areas without affecting the rest of the photo. Finally, tweak the Black Point to add contrast and make the edges more defined. Increasing the black levels slightly adds depth and gives the photo a polished finish too. Pro Tip: These adjustments work wonders on the car’s tires, grille, and other shadowed parts. Step 4: Enhance Colors with Saturation and Vibrance Now it’s time to make the car’s paint and surroundings pop! Adjust the Saturation to make the colors more vivid. Then, fine-tune the Vibrance to subtly enhance the muted tones. Like the sky or greenery around the car. This helps balance the overall look without making it look overly edited. Pro Tip: Be careful not to overdo the saturation. You want the photo to look eye-catching, not unrealistic. Step 5: Crop and Rotate for the Perfect Composition Finally, I crop and rotate the photo to focus on the car and remove distractions in the background. Cropping out unnecessary clutter draws attention to the car and creates a more professional look. Follow the rule of thirds for better composition. Then align the car along one of the grid lines when cropping. Now you know how to edit car photos on iPhone using its built-in tools! With just a few tweaks, you can transform an average car photo into something truly stunning. Ready to take your edits further? In the next section, I’ll share my favorite third-party apps for professional-level edits. Let’s keep going! Related Links You Might Find Helpful: Advanced Car Image Editing Tips Using Third-Party iPhone Apps If you’re ready to take your car photos to the next level then third-party apps can offer advanced editing features. These tools provide
How to Edit Car Photos in Photoshop for Jaw-Dropping Results (5 Steps)

Want to know how to edit car photos in Photoshop? Photoshop can take your car photos from average to jaw-dropping. You can use Photoshop to create professional car images for social media. It will also help you to elevate your photography portfolio and boost online sales. If you’re a photographer, a car enthusiast, or running a business then learning how to edit car photos in Photoshop is a skill that changes the game. Editing car photos isn’t just about making them look good. It’s about transforming every detail from the car paint’s shine to the background’s lighting to create a captivating image that stands out. In this guide, I’ll show you step-by-step how to edit car photos in Photoshop, fix common issues, and bring out the full potential of every shot. You don’t need to be a pro to get started. I’ll walk you through how to clean up car photos, fix common issues like glare and shadows, and even add some creative touches to make them stand out. By the end, you’ll know how to transform ordinary car images into stunning visual assets, step by step. Ready to get started? Let’s dive in! Why Learn How to Edit Car Photos in Photoshop? High-quality car photos are so important. They make a lasting impression whether you’re selling cars online, showcasing your photography portfolio, or posting on Instagram. People connect with visuals and an eye-catching car photo can grab attention instantly. Adobe Photoshop helps you fix the most common car photo problems. Such as glare on windows, dull paint colors, or distracting reflections. These are all things you can easily fix using Photoshop. You can also enhance the lighting, add dramatic skies, or even change the car’s color. Professional-looking car edits are the difference between a photo that gets ignored and one that stops someone mid-scroll. Step by Step: How to Edit Car Photos in Photoshop Step 1: Getting Started with Car Photo Editing in Photoshop Starting with the right image is everything when editing car photos. You should choose high-resolution photos with good lighting and sharp details. Photos taken in natural light often work best. But don’t worry if yours aren’t perfect. We’ll fix that in Adobe Photoshop. Before diving in, you need to ensure you have Adobe Photoshop installed. Tools like the Adobe Camera Raw plugin or presets can also help speed things up. Some plugins like Nik Collection are also popular for their ease of handling advanced edits. Setting Up Your Workspace Photoshop can feel overwhelming. But a little setup goes a long way. You can customize your interface to focus on essential tools like the Layers Panel, Adjustment Layers, and Toolbar. This keeps distractions to a minimum and makes editing more efficient. Next, you need to enable non-destructive editing by working with layers. For example, when making color changes or adding effects you can apply them to separate layers. You can always go back to the original image that way. Trust me, this one trick will save you hours of rework! Lastly, organize your files. You can create folders for the original image, exported files, and PSDs (Photoshop project files). Keeping everything organized also ensures you won’t lose track of your work. Step 2: Basic Adjustments to Enhance Car Photos Cropping and Straightening Your Image Start by cropping your car photo. This helps focus attention on the car and removes unnecessary distractions. You need to use the Crop Tool in Photoshop. Also, stick to popular aspect ratios like 16:9 for a clean and professional look. Next, straighten the horizon. If your car photo looks tilted then it can throw off the viewer’s perception. You can use the Straighten Tool within the Crop Tool to align the horizon perfectly. A straight photo always feels more polished. Lighting and Exposure Adjustments Lighting can make or break a car photo. You can start by opening the Camera Raw Filter in Photoshop. This tool allows you to adjust brightness, contrast, shadows, and highlights easily. You need to reduce harsh shadows and enhance highlights for balanced lighting. Adjust the exposure slider until the image looks bright but natural. This will also focus on making the car stand out without overdoing it. Color Correction and Enhancement Photoshop’s Hue/Saturation tool is a lifesaver when it comes to color correction. If the car’s color looks off then you can use this tool to adjust it until it matches the real-life shade. You can also use the White Balance adjustment to correct the overall tone of the photo. Want to make your car pop? Boost the vibrancy slider. This enhances the car’s colors without making the photo look overly saturated. Also a little adjustment here can make the difference between a dull photo and one that stands out. For more advanced tips, check out the color grading tutorial below. It’s packed with practical steps for achieving that professional-grade look. Removing Distractions and Imperfections Removing Reflections and Glare Reflections and glare can ruin a car photo’s professional look. But Adobe Photoshop makes fixing these easy. I start by using the Clone Stamp Tool to cover unwanted reflections. You need to pick a nearby clean area and carefully stamp over the reflection to make this work. For minor glare, the Healing Brush Tool is perfect for blending the area naturally. If the glare is on the windshield or metal, I sometimes reduce highlights using Camera Raw adjustments. This softens it without losing detail. Eliminating Background Clutter A messy background can take attention away from the car. That’s why I like to clean things up using Adobe Photoshop’s Pen Tool. This tool lets me isolate the car by drawing precise paths around its edges. Once I’ve selected the car, I can replace the background with a plain color or a dramatic scene that complements the car. For example, a sleek car often looks great against a sunset or city skyline. If you’re new to background removal then watch this tutorial on mastering the Pen Too: Fixing Scratches and
How to edit car photos in Lightroom mobile (6 Easy Steps)

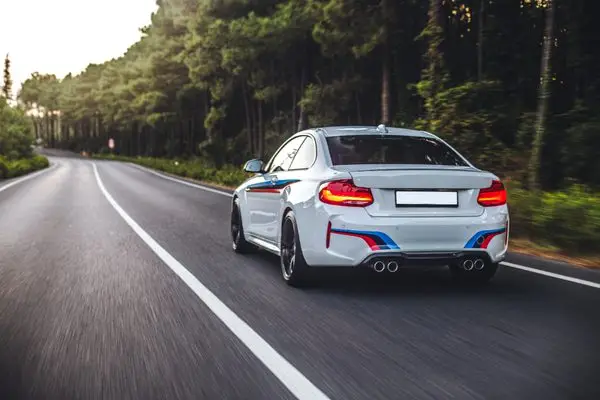
Learn how to edit car photos in Lightroom mobile like a pro! Boost car paint shine, fix scratches, and create stunning edits in minutes.
How to edit a car photo: Best Tools & Techniques (2025)

Want to know how to edit a car photo like a pro? The right editing techniques can make your car images stand out. You can use those eye-catching car images in online listings or portfolios. In this post, I’ll show you everything you need to know about how to edit a car photo. I will give you the right tools and steps for mastering essential techniques. By the end, you’ll know how to transform any car photo into a polished masterpiece. Ready to get started? Let’s dive in! Why Car Photo Editing Matters Have you ever noticed how cars in advertisements look flawless? That’s no coincidence. Edited car photos are essential for businesses like car dealerships or rental services. A polished car photo can enhance a vehicle’s appeal. It can even increase buyer interest. For example, potential buyers are more likely to click on cars that look clean, vibrant, and well-presented while scrolling through online listings. Imagine a car photo with distracting reflections or poor lighting. It’s not going to leave a good impression. On the other side, a professionally edited photo with a balanced background, sharp details, and vibrant colors can make any car stand out. If you’re into car photography then you need to understand the benefits of car photo editing. Because it can help you take your photos to the next level. Preparing for Car Photo Editing You need a good photo to work with before you dive into editing. Because starting with a high-quality image is half the battle won. Use Proper Equipment A DSLR camera or a mirrorless camera works best for car photography. These cameras provide sharpness and detail. These are essential when editing. A tripod helps you maintain stability and proper lighting. Such as natural sunlight or diffused lighting can reduce unwanted shadows. Set Up the Background The background can make or break your car photo. You should choose a clean and simple backdrop to highlight the car. Parking lots, garages, and open fields are great options. You also need to ensure the lighting matches your desired replacement if you plan to replace the background later. Capture Multiple Angles Take shots from different angles such as close-ups of unique details like wheels or logos. This ensures you have plenty of options when you start editing. For more ideas, check out Tips for Shooting Cars at Night. Best Tools for Car Photo Editing You’ll need the right tools if you’re wondering how to edit a car photo effectively. Here’s a breakdown of some popular editing software: 1. Adobe Photoshop Adobe Photoshop is the top choice for professionals. It’s also great for beginners who are looking for how to edit car photos. It offers advanced features like the Spot Healing Brush for removing blemishes. The Clone Stamp tool is used to fix imperfections, and Adjustment Layers are used to tweak colors. It has a steep learning curve. It’s also perfect for achieving flawless edits. 2. Adobe Lightroom Adobe Lightroom is a great option if you’re new to editing or just need quick color corrections. It’s also user-friendly and good at adjusting lighting, exposure, and color grading. 3. GIMP GIMP is a free and powerful tool for those on a budget. It doesn’t have all the features of Photoshop, but it’s perfect for basic edits. You can easily do background adjustments and color corrections using this open source image editing software. 4. Canva Canva isn’t a traditional photo editor, but it’s handy for quick edits. It’s a great online image editing tool for resizing car photos. You can also add text overlays for social media posts. Comparison of Tools: Tool Best For Price Adobe Photoshop Advanced editing & retouching $22.99/month Adobe Lightroom Color correction & presets $9.99/month GIMP Free editing with essentials Free Canva Social media-friendly edits Free & Paid Now you know why car photo editing matters and have the tools ready. It’s time to get hands-on. In the next section, I’ll guide you through a step-by-step process on how to edit a car photo. You will know about cropping, lighting adjustments, and removing imperfections. Let’s dive into the practical part of car photo editing! Related Links for Inspiration: Step-by-Step Guide: How to Edit a Car Photo Editing a car photo doesn’t have to feel complicated. You can follow the step-by-step guide i shared below. This will help you get a professional car image with the right tools and techniques. Step – 1: Cropping and Framing Cropping and framing are the most important thing for editing car photos. The goal is to remove distractions and highlight the car’s best features. Choose the Right Crop: Start by deciding what you want to focus on the photo. The car should be centered or slightly offset to create a visually pleasing composition for most car photos. You should avoid cropping out essential elements like wheels or mirrors. Common Aspect Ratios for Car Photos: Tools for Precise Cropping: You can use Adobe Photoshop or Lightroom for precise cropping. Canva is also a good option for quick adjustments if you’re working on social media-friendly photos. Pro Tip: Use the Rule of Thirds grid in your editor to align the car with natural focal points in the frame. For more tips, check out this guide to photo composition. Step – 2: Adjusting Lighting and Colors The lighting and colors of your car photo can completely change how it feels. Correcting exposure and enhancing colors make the car look more vibrant and realistic. Correct Exposure for Car Photo: If the photo is too dark or too bright then use tools like Brightness and Contrast in Photoshop or the Exposure slider in Lightroom. You should go for natural lighting that matches the setting. Enhance Paint Colors in Car Image: Make the car paint pop by increasing saturation and contrast, but don’t overdo it. These tweaks often look more professional. Adjust the Hue slider to refine specific colors. Such as the red of a sports car or the blue of a sedan. Add
How to Edit Car Photos in Lightroom – Step-by-Step Guide

Ever wondered how to edit car photos in Lightroom? Looking to take your car photography to the next level with professional-quality edits? Lightroom is packed with features that can transform any car photo from ordinary to extraordinary. You can use Adobe Lightroom to enhance reflections, perfect metallic tones, and correct colors, Lightroom has everything you need. It’s also great for editing car photos for a dealership, your portfolio, or just for fun. In this guide, I’ll show you step-by-step how to edit car photos in Lightroom. By the end, you’ll feel confident creating polished and professional-looking car images. So, grab your favorite car photo, and let’s dive in! Why Edit Car Photos in Lightroom? If you’ve ever asked, “Why should I bother editing car photos in Adobe Lightroom?” let me break it down for you: Here’s what makes Lightroom stand out for car photo editing: Lightroom simplifies the process and makes your car photos look stunning. It’s great for beginner and someone with some experience, Why This Matters High-quality edits can make your car photos more eye-catching. You can upload them to social media, sell a vehicle online, and build your portfolio. Learning how to edit car photos in Lightroom will save you a lot of time. It will always give incredible results. Pro Tip: Watch this video to help you get started if you are new to Lightroom. Pre-Editing Tips for Car Photos It’s essential to set the foundation for great edits before jumping into Adobe Lightroom. Editing becomes much easier when you start with high-quality photos and a well-organized workspace. Choose the Right Photo Start with a high-resolution image to retain maximum detail during editing. It’s also important to shoot in good lighting conditions. Overcast days are great for car photography. Because they reduce harsh shadows and reflections. Try positioning the car to avoid unwanted glare if you’re shooting in bright sunlight. Here are a few tips according to expert photographers: Pro Tip: For more car photography tips, check out this article on car photo shoot setups. Organize Your Files in Lightroom Import them into Adobe Lightroom once you’ve selected your photos. A well-organized workspace can save you hours of frustration. Drag and drop your car photos into Lightroom’s Library module. You can sort them into folders from there. Group similar shots, like front angles, interiors, or close-ups, into collections for easier access. Tag your photos with keywords like “car side view” or “sports car interior” to find them quickly later. Pro Tip: Learn more about file management and Lightroom organization in this helpful guide. Now that your photos are ready to go it’s time to dive into the fun part—editing! In the next section, we’ll cover the basics, including how to adjust exposure, contrast, highlights, and more. This step is the most important for creating a solid foundation for your edits. Ready? Let’s start by mastering the basics of how to edit car photos in Lightroom! Steps to Edit Car Photos in Lightroom Step 1 – Adjust Basic Settings The Basic Panel is the perfect place to start when learning how to edit car photos in Lightroom. It’s where you lay the foundation for your edits by adjusting brightness, contrast, and other essential settings. Let’s walk through the key tools in this panel. Exposure Think of exposure as the brightness of your photo. Too bright, and you’ll lose details; too dark, and the image will look muddy. Use the Exposure slider to balance the lighting so the car and background are evenly lit. You should tart small. Because moving the slider too far in either direction can ruin the image. Contrast The Contrast slider helps make the car pop by deepening the differences between light and dark areas. Increasing contrast can enhance the car’s edges and make it stand out. I find that a moderate increase often works best for car photos. Highlights and Shadows This is where you bring out the details in the reflections on the car and the darker areas. Such as the tires or undercarriage. Lowering the Highlights slider reduces glare from reflective surfaces. On the other hand increasing the Shadows slider adds visibility to darker areas. Whites and Blacks Adjusting the Whites and Blacks sliders can help you get a clean and polished look. Slide Whites up to add brightness without overexposing. Then bring Blacks down slightly to create depth and definition. Pro Tip Not sure where to begin? Click the Auto Settings button in Lightroom’s Basic Panel. It provides a great starting point. You can tweak it to fit your style. Need more help mastering Lightroom’s basics? Check out this basic panel tutorial for additional insights: Step 2 – Correct the Colors Color correction is key when editing car photos. A car’s paint job should look vibrant yet natural. Lightroom’s White Balance and HSL Panel make this easy. White Balance White Balance affects the overall tone of the image. Use the Temperature slider to make warm colors richer or cool tones sharper. I often set the White Balance to “As Shot” and adjust slightly to ensure the car paint and surrounding colors look realistic. HSL Panel The HSL Panel (Hue, Saturation, and Luminance) is great for perfecting car colors. Color Grading Tthe Color Grading tool lets you adjust the highlights, midtones, and shadows. This is great for adding a unique vibe. This can create a cinematic look. It also adds a distinct mood to your car photo. For example, adding a slight blue tone to the shadows gives a cool and modern feel. Looking for tips on working with colors? This HSL adjustments Lightroom guide has got you covered. Step 3 – Enhance the Details Once the colors are on point, it’s time to bring out the details. Lightroom’s tools for Clarity, Texture, and Sharpening make your car look sharper and more polished. Clarity The Clarity slider adds depth by emphasizing edges and textures. Increasing clarity can make the car’s contours, grilles, and trims look sharper. Be careful not to overdo