9 Top Professional Ecommerce Image Editing Services (2026)

Discover the best ecommerce image editing services to boost your sales.
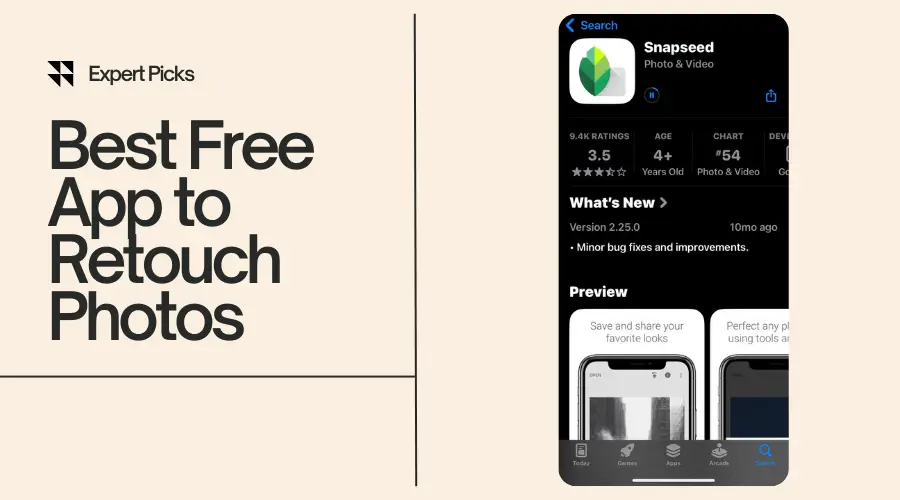
How to Become a Photo Retoucher: Step-by-Step Guide (2025)

I remember the first time I edited a photo. I thought a simple filter would do the trick. But as I learned more, I realized real photo retouching is what brings pictures to life. Today, brands, photographers, and businesses all expect their photos to look polished and professional. And that’s where skilled photo retouchers are making a real difference. šø With social media booming and e-commerce growing every day, the need for clean, beautiful images has exploded. Whether itās a wedding album, a fashion shoot, or a product listing, retouched photos help create the perfect first impression. What You’ll Learn in This Guide In this guide, Iāll walk you through how to become a photo retoucher step-by-step. Youāll learn what photo retouching really means, what a photo retoucher does, how to start your career, how much you can earn, and how to price your services smartly. Iāll also share real-world tips to build your skills faster and stand out from the crowd. By the end, youāll know exactly what it takes to start your journey as a professional photo retoucher! Is Becoming a Photo Retoucher Right for You? Becoming a photo retoucher can be a great choice if you love working with images, have an eye for detail, and enjoy making photos look their best. You donāt need an expensive degree or fancy studio equipment to get started. You just need passion, patience, and practice. If you’re wondering how to become a photo retoucher, youāre already on the right track! š Step-by-Step: How to Become a Photo Retoucher Step 1: How to Learn Photo Retouching š When I first started, I kept asking myself: how to learn photo retouching fast without feeling overwhelmed? Honestly, the best ways are simple ā take online courses, watch YouTube tutorials, and practice every single day. Websites like Udemy and Skillshare offer affordable courses if you want structured learning. YouTube is great too if you prefer free lessons. I personally started by watching free videos, then moved to paid classes when I got serious. Top Skills You Need to Develop: You might wonder, how does retouch work in photos? Itās basically about fixing imperfections while keeping the natural look. If you want a deeper dive, check out what does photo retouching mean to understand it better. Step 2: How to Become a Professional Photo Retoucher šÆ Once you master the basics, youāll naturally want to know how to become a professional photo retoucher. Hereās what worked for me: Are Certifications Worth It? Honestly, you donāt need a degree or certificate to succeed. But certifications from places like LinkedIn Learning can help you stand out when you’re starting. Still, your skills and your portfolio matter way more than a paper certificate. Step 3: How to Make a Photo Retouching Portfolio šø If you ask me, how to make a photo retouching portfolio is simple: Show your best work. Your portfolio must prove what you can do. What a Strong Portfolio Looks Like: How Many Samples Should You Include? Start with 10 to 15 solid examples. Quality beats quantity here! Free and Paid Platforms to Showcase Your Work: Step 4: How to Make Money Retouching Photos š° This is the exciting part ā how to make money retouching photos! Freelance Platforms to Find Clients: Setting Up Your Services and Prices: When I started, I wasnāt sure how much do photo retouchers make or how much to charge for photo retouching. Here’s a simple guide: Setting your price depends on the time, effort, and type of client. This article about how much to charge for retouching photos helped me a lot when I was learning. Always list exactly what your service includes ā like skin smoothing, blemish removal, or color balancing ā to avoid confusion. Step 5: How to Start a Photo Retouching Business š If you want freedom, youāll eventually think about how to start a photo retouching business. I went through it myself, and hereās how: Naming, Branding, and Legal Setup Basics: How to Build a Loyal Client Base: Before you know it, youāll have repeat clients who trust you with all their projects. ā Quick Recap: We covered how to learn photo retouching, how to become a professional photo retoucher, how to make a photo retouching portfolio, how to make money retouching photos, and how to start a photo retouching business. If you ever wondered how much does a photo retoucher make, starting freelancers can earn $20,000ā$50,000 per year. With more experience, your income can grow a lot more! How to Find Work as a Photo Retoucher When I first started learning how to become a photo retoucher, finding work felt a little scary. But trust me, once we know where to look and how to show our skills, it gets easier. Letās go through it step-by-step! š 1. Build a Strong Portfolio First Before we apply for any jobs, we must build a good portfolio. Clients want to see real examples. I always tell beginners to practice on sample photos and create a simple portfolio showing before-and-after edits. If you want help, here’s a great guide on how to make a photo retouching portfolio š. š¬ Tip: Show different types of edits like portraits, weddings, products, and magazines. Clients love seeing variety! 2. Create Profiles on Freelance Platforms One of the fastest ways to find work is by signing up on freelance websites. I created profiles on Upwork, Fiverr, and Freelancer. These places are perfect for beginners who want to start a photo retouching business. When we start, we can offer lower prices to get reviews. Later, we can raise our rates once we build trust and a good profile ā. 3. Reach Out to Photographers and Studios Directly Another way I found work was by reaching out directly. I made a list of wedding photographers, e-commerce studios, and portrait photographers. I sent them short emails introducing myself and offering a free trial edit. Since many people ask, “Do wedding photographers retouch photos?”
Best free App to Retouch Photos Fast and Easy (2025)

Best free app to retouch photosāthatās exactly what youāre searching for, right? They are really useful if you’re fixing a quick selfie, smoothing out skin, or removing something from the background. In 2025, there are plenty of options out there. But only a few actually deliver pro-level results without costing you a dime. So, whatās the best free app to retouch photos? Snapseed is hands down one of the best free apps for photo retouching out there. Itās simple and powerful. Also, it gives you the tools you need to retouch photos fast. All this can be done without watermarks or complicated steps. In this post, Iāll walk you through the top free photo retouching apps you can start using right now. I will cover easy-to-understand breakdowns, pros and cons, and tips for flawless edits. Letās jump in and find your new favorite photo-fixing sidekick! š 2025 Roundup ā Best Free Apps to Retouch Photos When I searched for the best free app for retouching photos, I didnāt want a long list full of junk. I wanted fast, clean edits with no hidden costs. Thatās exactly what Iāve put together here. Iāve tested each of these best photo retouch app myself. So what youāll read below is based on real use, not just features on paper. These mobile retouching apps are all free, beginner-friendly, and loaded with powerful photo face editor tools, image cleanup tools, and other must-have touch-up photo app features. Ready? Letās find your favorite. 1. Snapseed ā Best for Beginners š± Download Snapseed for Androidš± Download Snapseed for iOS If you’re just starting out, Snapseed is my top pick for the best free app to retouch photos. Itās super easy to learn and gives you control over your edits without being confusing. Key Retouching Features of Snapseed: Pros of Snapseed: ā Simple interface.ā Great tools for photo face editing.ā No ads or watermarks.ā Best photo retouch app for Android and iPhone. Cons of Snapseed: ā No beauty filters.ā Might feel basic if you want advanced AI. Ideal For: This is the best app to retouch photos for beginners who want clean and no-fuss retouching. 2. Adobe Photoshop Express ā Best for Smart Auto Edits š± Download Adobe Photoshop Express for Androidš± Download Adobe Photoshop Express for iOS If you want smart editing with one tap then Adobe Photoshop Express is a solid option. Itās one of the best apps to retouch photos on iPhone. Itās made by Adobe, so the tools are solid, even in the free version. Key Retouch Features of Adobe Photoshop Express: Pros of Adobe Photoshop Express: ā Smart AI retouch toolsā Powerful background cleanupā Trusted brand Cons of Adobe Photoshop Express: ā This best free photo retouch app requires Adobe accountā Some features are locked behind the paywall. Ideal For: Anyone who wants smart auto edits without digging into details. 3. Lightroom Mobile ā Best for Color Retouching š± Download Lightroom Mobile for Androidš± Download Adobe Lightroom for iOS If youāre picky about color then Lightroom Mobile is the best free photo retouching app. Itās free, clean, and gives amazing control over tones, lights, and shadows. Key Retouch Features: Pros of Lightroom Mobile: ā Pro-grade color controlā Best for light and contrast tweaksā Non-destructive edits Cons of Lightroom Mobile: ā Takes time to learnā No built-in beauty filters Ideal For: Intermediate users who want natural-looking color edits. 4. AirBrush ā Best for Portrait Retouching š± Download Airbrush for Androidš± Download Airbrush for iOS AirBrush is the best free photo retouch app for iPhone when I want to edit selfies or portraits. Itās packed with photo face editor tools that smooth skin, whiten teeth, and moreāall free. Key Retouch Features of AirBrush: Pros of AirBrush: ā Fast beauty retouchingā Realistic resultsā Great for social media Cons of AirBrush: ā Some tools need premiumā Ads can be annoying Ideal For: Selfie lovers and beauty bloggers. 5. YouCam Perfect ā Best for Beauty Filters š± Download YouCam Perfect for Androidš± Download YouCam Perfect for iOS YouCam Perfect is great if you love filters that do the job for you. With one tap, it smooths skin, brightens eyes, and adds glow. No effort needed! Key Retouch Features of YouCam Perfect: Pros of YouCam Perfect: ā One-tap beauty editsā Easy to useā Great for Instagram-ready photos Cons of YouCam Perfect: ā Watermark unless you upgradeā Limited manual control Ideal For: Quick edits before posting online. 6. Fotor ā Best All-in-One App š± Download Fotor for Androidš± Download Fotor for iOS Fotor combines everything in one place. It works for retouching, collage making, and even basic design work. You donāt need multiple apps. Key Retouch Features of Fotor: Pros of Fotor: ā Multi-purpose toolā Clean UIā Built-in AI tools Cons of Fotor: ā Some features require loginā Ads pop up frequently Ideal For: Anyone who wants editing and design in one free app. 7. PicsArt ā Best for Creative Edits š± Download PicsArt for Androidš± Download PicsArt for iOS PicsArt isnāt just a retouching appāitās a playground. If you want to combine retouching with creative effects, this is where I have the most fun. Key Retouch Features of PicsArt: Pros of PicsArt: ā Huge effects libraryā Fun tools and templatesā Easy to share directly to social Cons of PicsArt: ā Interface can feel busyā Ads without subscription Ideal For: Creative users and Gen Z editors. 8. PhotoDirector ā Best for AI Retouching š± Download PhotoDirector for Androidš± Download PhotoDirector for iOS If youāre into AI tools, PhotoDirector is one of the best touch-up photo apps right now. Itās free and includes futuristic features for editing. Key Retouch Feature of PhotoDirectors: Pros of PhotoDirectors: ā Smart and fastā Good results with AIā Constant updates Cons of PhotoDirectors: ā Limited manual editsā Ads unless you subscribe Ideal For: Users who want quick results with minimal input. 9. Pixlr ā Best for Fast Fixes š± Download Pixlr for Androidš± Download Pixlr for iOS Sometimes, I just want to do a quick
How to Photo Retouch in Photoshop Like a Pro in Minutes (2025)

Ever taken a great photo, but thereās just one thing off? Maybe a pimple showed up last minute. Maybe the lighting made your skin too shiny. Or maybe thereās just something in the background that ruins the whole vibe. Iāve been there, and if youāve felt the same, youāre not alone. Thatās where photo retouching comes in. In simple terms, photo retouching means fixing or improving parts of a photo to make it look better. Youāre not changing who someone is, youāre just polishing the image. You can smooth skin, remove blemishes, whiten teeth, reduce shine, and clean up messy backgrounds. These little tweaks can make a big difference. If youāve ever wondered how to photo retouch in Photoshop then youāre in the right place. Photoshop might look scary at first. But once you understand which tools to use and how to use them, it becomes super easyāeven fun. In this blog post, Iāll show you step-by-step how I retouch photos using Photoshop. Youāll learn how to remove blemishes, smooth skin naturally, whiten teeth, fix lighting, and more. Iāll also share the Photoshop retouching tools you need and explain when to use each one. Think of it as a friendly crash course to retouch like a pro, even if you’re brand new. This guide is perfect for: By the end, youāll know exactly how to photo retouch in Photoshop without wasting hours. Letās jump in and make those photos pop! šÆ What is Photo Retouching in Photoshop? Photo retouching means cleaning up a photo. Such as removing small imperfections like pimples, wrinkles, and distracting background spots. Also, it includes smoothing skin, fixing lighting issues, and sometimes enhancing features like eyes or teeth. So, whatās the difference between retouching and regular photo editing? Itās simple. Photo editing is more about fixing exposure, adjusting colors, cropping, or changing brightness. It sets the foundation. But retouching adds that pro finish. Itās the step that makes a photo look polished. Especially for portraits or product shots. Now, I will explain how to do photo retouching in Photoshop. Letās start by talking about the types of edits you can do: These edits help create a clean and professional image, without changing the person. When you know how to photo retouch in Photoshop, youāll be able to take almost any image and make it look sharper and cleaner. And you donāt need years of experienceāyou just need the right tools and steps. Contact Us for Professional Photo Retouching Service With Free Trial Letās talk about that next š Tools Youāll Need to Retouch Photos in Photoshop Before you start retouching a photo you need to open Photoshop. Make sure you’ve got your favorite tools ready. These tools help you work faster and smarter. Here are the must-haves if you want to learn how to photo retouch in Photoshop: š§ Spot Healing Brush Tool This is my go-to for small spots. Just click on a blemish, and it disappears. It blends with the nearby skin like magic. š§½ Clone Stamp Tool I use this for bigger cleanups. It copies one part of the image and pastes it over another. Itās great for removing background mess or fixing skin areas. āļø Patch Tool You can drag this tool around an area you want to fix. Then move it to a better patch of skin. Photoshop blends it in. I like using it for under-eye bags or wrinkles. š Dodge & Burn Tool These tools help lighten (Dodge) or darken (Burn) areas. I use Dodge to brighten eyes and Burn to add depth to cheekbones or jawlines. š§ Blur Tool If some areas look too sharp like harsh pores or razor bumps. I gently use the Blur Tool to soften the spot. šļø Adjustment Layers (Curves, Levels, etc.) These layers help me fix lighting, color balance, and skin tones. The best part? You can go back and change them anytime without ruining the image. These are the core Photoshop retouching tools you should always have on hand. They’re easy to learn. Once you know what each one does, youāll start seeing big results. š You can also check out Adobeās official guide for more on retouching and repair tools. ā Quick checklist before you start: ā Open your image in Photoshop.ā Duplicate the background layer (so you donāt edit the original).ā Set up a healing brush, patch tool, and clone stamp.ā Add an empty layer for non-destructive edits.ā Keep Adjustment Layers ready to tweak colors or exposure. Trust me, when you know how to use these tools, photo touch-up becomes fast and fun. Youāll feel confident every time you retouch an image. And if youāre still unsure where to begin, no worries. Letās jump into your first edit together šÆ Check this complete guide about photo retouching. How to Photo Retouch in Photoshop – Step by Step ⨠How to Do Basic Skin Retouching Alright! Time to get hands-on. This is the part where I show you how to retouch photos with Adobe Photoshop step by step. Letās start with basic skin retouching. Most photos I retouch start with the skin. People want to look clean, fresh, and natural. They donāt want overly airbrushed. So you should try to fix spots while keeping the texture. šŖ Step 1: Remove Blemishes You need to zoom into the face and grab the Spot Healing Brush Tool. Click once over a pimple or spot and boom, itās gone. If the skin is a little uneven or textured, I use the Patch Tool. I drag around the area I want to fix and swap it with cleaner skin nearby. For tougher spots. I usually bring in the Clone Stamp Tool and gently paint over the area with nearby texture. š§“ Step 2: Smooth the Skin Naturally Hereās where most people mess up. They blur too much. Thatās why I use Frequency Separation. Sounds technical, but Iāll explain. Basically, I split the image into two layers: Then, I blur the tone layer to
10 Best Online Photo Retouching Services Transform Your Photos

The best online photo retouching service is what you need when your photos donāt match the moment you captured. Professional photo retouching services can remove distracting background, uneven skin tone, or just poor lighting and give your images that professional look without doing it all yourself. So, whatās the best online photo retouching service? The short answer: It depends on your needs. Some services are perfect for quick face touch-ups, while others specialize in product editing, wedding photos, or high-end portrait work. In this post, Iāll walk you through the top 10 services that stand out for their quality, speed, and valueāno editing skills required. So stay with me because by the end of this post, youāll know exactly which best online photo retouching service fits your budget, your goals, and your photos šø 10 Best Online Photo Retouching Services 1. Smart Clipping – Best Online Photo Retouching Service Provider Smart Clipping is a professional online photo retouching service specializing in eCommerce and bulk photo retouching. They offer services like background removal, image masking, ghost mannequin effects, highend retouching, color correction and many more. Smart Clipping is Best For: Top Features of Smart Clipping: Pros: Cons: Price Range: Who Should Use It: Personal Verdict: If you’re managing an online store and need consistent and high-quality product images, then Smart Clipping is the best reliable choice for bulk photo retouching. šØ Contact Smart Clipping for Professional Photo Retouching! 2. FixThePhoto FixThePhoto is a well-established online photo retouching service. They offer a wide range of editing options. Their services include portrait and beauty retouching, wedding photo editing, and more. FixThePhoto is Best For: Top Features of FixThePhoto: Pros: Cons: Price Range: Who Should Use It: Personal Verdict: I recommend them for those looking for professional photo editing. FixThePhoto stands out as one of the best online photo retouching services available. 3. Retouchup Retouchup offers affordable photo retouching services with a focus on simplicity and quick delivery, catering to both professionals and individuals. Retouchup is Best For: Top Features of Retouchup: Pros: Cons: Price Range: Who Should Use It: Personal Verdict: Retouchup is a great option for those seeking efficient and affordable photo retouching services without compromising on quality. Best Professional Ecommerce Image Editing Services 4. Pixelz Pixelz specializes in professional photo editing services for eCommerce, offering background removal, retouching, and other enhancements tailored for product images. Pixelz is Best For: Top Features of Pixelz: Pros: Cons: Price Range: Who Should Use It: Personal Verdict: Best for businesses needing consistent and high-quality product image editing. Pixelz offers one of the best online photo retouching services tailored for eCommerce. 5. WeEdit.Photos WeEdit.Photos provides professional photo editing services with a focus on wedding and portrait photography. They deliver personalized edits to match your style. WeEdit.Photos is Best For: Top Features of WeEdit.Photos: Pros: Cons: Price Range: Who Should Use It: Personal Verdict: WeEdit.Photos is an excellent choice for those wanting personalized and professional photo editing. They are one of the best online photo retouching services for weddings and portraits. 6. PhotoRetouchingUp PhotoRetouchingUp gives photographers the freedom to submit detailed instructions. Theyāre flexible with styles and can handle both basic and complex edits. What Theyāre Best For: Top Features: Pros: Cons: Price Range: Who Should Use It: Personal Verdict: If you want to give clear input on your editing style, PhotoRetouchingUp is worth trying. Itās one of the best online photo retouching services for photographers who know exactly what they want. 7. Fiverr Retouchers Fiverr is a freelancing marketplace where you can find hundreds of photo retouchers offering everything from basic edits to advanced retouching. What Theyāre Best For: Top Features: Pros: Cons: Price Range: Who Should Use It: Personal Verdict: Fiverr can surprise you. Iāve found solid editors for $10 or less. If youāre okay with shopping around, it can be the best online photo retouching service on a tight budget. Helpful Tip: Hereās a guide to finding the right freelancer on Fiverr. 8. Clipping Path India Clipping Path India offers background removal, shadow creation, and image retouching for product photos. They work mostly with eCommerce sellers. What Theyāre Best For: Top Features: Pros: Cons: Price Range: Who Should Use It: Personal Verdict: If your main concern is product presentation, Clipping Path India is one of the best online photo retouching services for background cleanup and color balance. 9. HighEndBeautyRetouching.com This site focuses on fashion, editorial, and glamor photo editing. They work with photographers and models needing that sharp, polished finish youād see in magazines. What Theyāre Best For: Top Features: Pros: Cons: Price Range: Who Should Use It: Personal Verdict: If you want your photos to look like they belong in Vogue, this is the best online photo retouching service for that glamor-magazine vibe š 10. Upwork Freelancers Upwork is another freelance platform where you can post a job and hire editors who match your style and budget. What Theyāre Best For: Top Features: Pros: Cons: Price Range: Who Should Use It: Personal Verdict: I like Upwork for building lasting relationships with editors. If you value consistency and custom edits, this could be the best online photo retouching service for you long term. š Comparison Chart: Best Online Photo Retouching Services Here’s a comparison chart summarizing the best online photo retouching services mentioned earlier: Service Best For Top Features Pros Cons Starting Price ā Smart Clipping All-in-one editing for businesses & creatives Image retouching, clipping path, background removal, bulk support, fast delivery Affordable, great quality, bulk-friendly, great support UI could improve visually for first-time users $0.29 ā $3.00/image FixThePhoto Portraits and individual users Manual retouching, wedding edits, Photoshop-based workflow Good for detailed edits, has mobile app Slower turnaround, higher cost for volume $6 ā $30/image Retouchup Basic retouching and volume edits Teeth whitening, glare removal, skin smoothing Fast service, low cost, simple process Limited high-end editing options $2 ā $10/image Pixelz E-commerce and product images Background removal, ghost mannequin, color consistency Strong automation, built for eCom Not ideal for portrait or lifestyle images
How to Retouch Photos on iPhone in 2025 (Super Easy Steps)

š±Learn how to retouch photos on iPhone in 2025 with easy steps to create flawless, professional-looking photos in minutes!
Best Mouse for Photo Retouching in 2025 (Expert Tested)

Best mouse for photo retouching ā thatās the one tool no serious retoucher should overlook. If youāre brushing away blemishes in Photoshop or fine-tuning colors in Lightroom then you should get one with speed, comfort, and precision. Trust me, Iāve been down the rabbit hole of editing with both basic and high-end gear. Once you find the right mouse, thereās no going back. So, what is the best mouse for photo retouching in 2025? After testing a bunch of options, the Logitech MX Master 4 stands out as the best all-around choice. Itās ergonomic, ultra-precise, and comes loaded with customizable buttons that make editing feel buttery smooth. But thatās not the only great pick. Some are better for tight budgets, others for Mac users or stylus fans. In this guide, Iāll walk you through the best mice for photo retouching this year. I will cover pro-level features, hands-on insights, and a few underrated gems that might just surprise you. Letās dive in! šØ Contact Us for Professional Photo Retouching Service! The Best Mouse for Photo Retouching in 2025 ā Top Picks 1. Logitech MX Master 4 (2025 Edition) Great for multitasking and comfort If you ask me which is the best mouse for photo retouching, Iād say the Logitech MX Master 4 is a top contender. Iāve used every version since the MX Master 2S, and this new 2025 edition takes everything to the next level. The scroll wheel is ultra-smooth, the thumb rest feels great, and the programmable buttons are super useful. When Iām editing photos, I can zoom in, switch tools, or even undo an action with just a click or flick. That really saves me time. The sensor is super precise. It is perfect for detailed retouching in Photoshop or Lightroom. Also, it connects to multiple devices, which helps if you’re working between a desktop and laptop. Pros of Logitech MX Master 4 ā Comfortable ergonomic designā Precise 8000 DPI sensorā Customizable buttons for editing shortcutsā Works with macOS and Windowsā Long battery life Cons of Logitech MX Master 4 ā A bit priceyā Takes time to get used to side scroll Price range: $99 ā $119 Best for: Professionals, multitaskers, and daily editors Want to see it in action? Check the Logitech MX Master 4 on Logitechās site for more details. Best photo retouching software for Mac 2. Apple Magic Mouse 3 Ideal for macOS users and minimalists The Apple Magic Mouse 3 might not look like your usual editing mouse, but it can be surprisingly helpfulāespecially if youāre a Mac user like me. I tested this mouse with Lightroom and Capture One on my MacBook, and the smooth touch surface gave me a unique editing feel. Now, Iāll be honestāit’s not the most ergonomic option out there. But for light retouching, browsing, and quick edits, itās perfect. Gestures like swiping and scrolling with one finger make your workflow feel seamless. It charges via USB-C now, which is a nice upgrade from the old Lightning port. Pros of Apple Magic Mouse 3 ā Sleek and minimal lookā Perfect integration with macOSā Multi-touch gestures are smoothā No setup needed Cons of Apple Magic Mouse 3 ā Not ideal for long editing sessionsā Limited button customization Price range: $79 ā $99Best for: macOS users, minimalists, light photo editors If you’re using a Mac, youāll love the Apple Magic Mouse 3 for its style and simplicity. 3. Wacom Intuos Pro Pen + Touch (Bonus Pick for stylus fans) Okay, this isnāt a regular mouse, but I had to include it. If you take retouching seriouslyālike pixel-level serious then the Wacom Intuos Pro is the best mouse for photo retouching in your toolkit. Iāve used it for everything from skin smoothing to dodging and burning, and the pen pressure control makes all the difference. You get a natural hand movement. This helps when you’re working on portraits, product photos, or detailed composites. Also, the ExpressKeys on the tablet work just like mouse buttons. You can program them to fit your workflow. Pros of Wacom Intuos Pro Pen ā Insanely accurateā Pressure sensitivity gives you more controlā Great for Photoshop, Lightroom, and Capture Oneā Custom ExpressKeys speed up workflow Cons of Wacom Intuos Pro Pen ā Not ideal for casual usersā Steeper learning curve than a regular mouse Price range: $249 ā $379Best for: Professionals, stylus lovers, detailed photo editing Curious how it compares to a mouse? Hereās a deep dive of Wacom Infus Pro Pen. 4. Razer Pro Click Mini High precision in a compact body If you want something small, sleek, and super accurate, the Razer Pro Click Mini deserves a spot on your desk. I bought this for travel editing on the go, and wowāit really punches above its size. The mouse has silent clicks (which I love during late-night edits) and a sharp 12,000 DPI sensor that handles delicate retouching tasks with ease. Itās great for both casual and serious editing sessions. The battery lasts a long time, and the build feels solid, even though itās lightweight. Pros of Razer Pro Click Mini ā Compact and travel-friendlyā Silent buttons for distraction-free workā Adjustable DPI up to 12,000ā Bluetooth and wireless options Cons of Razer Pro Click Mini ā Might be too small for big hands ā Limited extra buttons for advanced shortcuts Price range: $69 ā $89Best for: Travel editors, compact workspace users, casual retouchers You can learn more about it on Razerās official product page. 5. Kensington Expert Mouse Wireless Trackball A unique choice for retouchers who hate traditional mice Now, if youāre someone who hates moving a mouse around or dealing with wrist pain (like I did after long sessions), the Kensington Expert Mouse Wireless Trackball could be your wildcard pick for the best mouse for photo retouching. Itās not a mouse in the traditional sense. Rather itās a large trackball you control with your fingers, and thatās what makes it so interesting. The ball gives you precise control with very little wrist movement.
Best AI Photo Retouching App for Stunning Edits (2025)

AI photo retouching apps is changing the game for photographers, content creators, and everyday users who want stunning edits without spending hours in Photoshop. If youāre cleaning up a selfie, perfecting a portrait, or enhancing a product shot then AI tools can now do most of the heavy lifting for you. So, what is the best AI photo retouching apps for stunning edits? You can retouch photos with AI with some of the best apps including – Luminar Neo, Fotor AI Editor, Picsart, Remini, and Facetune. The best tools combine speed, accuracy, and smart features like skin smoothing, blemish removal, background cleanup, and even lighting correction. All are powered by artificial intelligence. From beginner-friendly apps to advanced desktop editors, thereās an AI to retouch photos for every editing style and skill level. In this guide, Iāll walk you through the top AI photo retouching software available today, what features to look for, and how to pick the right one for your editing needs. Letās dive in! šØ Contact Us for Professional Photo Retouching! The 10 Best AI Photo Retouching Apps for Stunning Edits 1. Luminar Neo ā Smart AI ai Photo Retouch Software for Pro-Level Results If you’re looking for AI photo retouching app that feels powerful but doesnāt overwhelm you, Luminar Neo is a great choice. I use it when I want fast edits with a high-quality look. What makes Luminar Neo stand out is how smart its tools are. The AI-powered skin retouching automatically smooths skin, removes blemishes, and keeps natural textures. It also has Relight AI to fix uneven lighting and Portrait Bokeh AI to blur the background just like DSLR cameras. The Sky AI lets you swap out dull skies in seconds. Itās perfect for photographers who need to save time by retouch photos with ai. You will get a polished and clean look in their photos. ā Best for: Photographers who want pro results fast Download Skylumās Luminar Neo 2. Fotor AI Editor ā Simple and Fast Ai Retouch Photo Free Fotor AI Editor is one of the easiest tools Iāve used for photo touch-ups. Itās a lightweight, browser-based AI photo retouching software that works great if youāre just starting out. With one click this AI photo retoucher can fix skin tone, reduce wrinkles, and smooth out imperfections. Itās perfect when I need to quickly clean up a selfie or adjust lighting before uploading to social media. The automatic photo retouching tools make it super user-friendly. You donāt need to tweak settings manually. It does the heavy lifting for you. If you want a clean, bright look without learning Photoshop, this is a solid pick. ā Best for: Beginners and casual users Try Fotorās AI photo retouching free 3. Picsart AI Tools ā Creative AI Photo Retouch Online Free If you’re editing on your phone and want something creative, I recommend Picsart AI Tools. Itās more than just a photo retouching app. It comes with fun and effective tools like a face enhancer, blemish remover, and even AI hair color changer. The app is super fast. I can edit photos in under a minute and share them right to Instagram. The photo beautification AI gives a natural glow, adjusts tones, and makes small edits that improve the photo without making it look fake. This AI photo retoucher also includes trendy filters, text, and stickersāperfect for content creators or influencers looking to boost their visual game. ā Best for: Social media creators who need quick and stylish edits Download Picsart AI Photo Editor 4. Remini AI ā Best for Restoring Old or Blurry Faces Remini AI saved a bunch of my old family photos. Itās one of the most talked-about AI photo retouching app options because of its ability to fix blurry, low-quality, or old pictures in seconds. I uploaded a grainy photo once, and Remini cleaned up the face with stunning clarity. This AI photo retoucher AI face enhancer boosts sharpness, reduces noise, and recovers facial details that seem lost. It works especially well for portraits, making it a favorite for photographers and even people restoring old prints. The app works on mobile, so you can fix images right from your phone. ā Best for: Face restoration and portrait clarity Download Remini for Mobile 5. BeFunky AI Photo Editor ā Balanced AI Retouching Photo Features for Business and Personal Use BeFunky offers a great balance between control and automation. Itās another solid AI photo retouching app that includes smart tools like AI background remover, skin softening, and eye enhancement. Iāve used it to clean up product photos for online stores and also for retouching casual portraits. It doesnāt feel too technical, but it still gives you room to tweak edits if you want a custom touch. Their automatic editing tools are perfect for small business owners who need clean, polished images without paying for expensive design help. ā Best for: Small business owners and marketers Explore BeFunky AI Tools These five tools are just the beginning. There are even more options coming up that I personally tested and found helpful for different types of editing. It can be beauty, product, or lifestyle content. Keep scrolling to find the next five picks in this guide on the best AI photo retouching app for stunning edits. If you’re liking what you’ve seen so far, you’re going to love what’s next! š” 6. Adobe Photoshop (Neural Filters) When I need full control over editing, I go with Adobe Photoshop. The Neural Filters inside Photoshop give me the power of both manual photo editing and AI-based image retouching. That combo is hard to beat. I can smooth skin, adjust facial features, and even change the direction of someoneās gaze with just a few sliders. These smart AI filters help speed things up without losing quality. I mostly use this tool when I’m working on detailed client portraits or commercial photo edits. Itās perfect for people who already understand layers and masking. ā ļø Note: Photoshop is part of Adobeās
Best photo retouching software for Mac in 2025
If youāre looking for the best photo retouching software for Mac in 2025, youāre in the right place. Whether you’re a professional photographer, a designer, or just someone who loves editing pictures, having the right software can make a huge difference. In 2025, image editing has become smarter and faster thanks to AI-powered tools. You no longer have to spend hours tweaking details manuallyāmodern software can automatically enhance your photos with just a few clicks. But with so many options available, choosing the right photo editing software for Mac can feel overwhelming. Thatās why Iāve put together this guide. Iāll walk you through the top Mac image retouching apps, highlight their features, and help you find the perfect fit for your editing needs. Whether you’re looking for professional photo retouching tools like Photoshop or beginner-friendly AI-based software, I’ve got you covered. Need Help with Photo Retouching? š Contact Us! What Youāll Learn in This Guide Hereās what Iāll cover:š¹ The top 10 best photo retouching software for Mac in 2025.š¹ A detailed comparison of features, pricing, and ease of use.š¹ Tips on choosing the best Mac photo retouching software for your needs.š¹ AI-powered vs. manual editing: What works best?š¹ FAQs on Mac image retouching tools and their capabilities. If youāre ready to level up your photo editing software for Mac, letās dive in! š Top 10 Best Photo Retouching Software for Mac in 2025 1. Adobe Photoshop ā The Industry Standard When people talk about the best photo retouching software for Mac in 2025, Adobe Photoshop still leads the way. Itās been the go-to software for professionals for decades, and it keeps getting better with new AI-powered tools. Why Photoshop Still Rules in 2025 Photoshop remains the best Mac image retouching software because of its powerful tools and precision editing. Whether you’re working on high-end portraits, product photography, or creative composites, Photoshop gives you total control. ā AI-Powered Retouching ā With tools like Generative Fill and Neural Filters, Photoshop can remove objects, enhance skin, and even change facial expressions in seconds.ā Advanced Brushes & Layers ā Retouching in Photoshop is precise, thanks to its layer-based editing and customizable brushes.ā RAW Image Editing for Mac ā Photoshop works seamlessly with Adobe Camera Raw, making it perfect for photographers. Subscription Pricing & Alternatives Photoshop is available through Adobeās subscription plan, starting at $20.99/month or as part of the Photography Plan with Lightroom for $9.99/month. If you prefer a one-time purchase, Affinity Photo is the best alternative. 2. Lightroom ā Best for Photographers If youāre a photographer, Adobe Lightroom is the best photo retouching software for Mac that simplifies editing while keeping everything organized. Itās perfect for batch editing, making global adjustments, and enhancing images with AI tools. Why Lightroom is a Must-Have in 2025 š· AI-Enhanced Masking ā Lightroom can automatically detect subjects and skies, making selective edits easier.ā Cloud Integration ā Your photos sync across all devices, so you can edit anywhere.š¼ RAW Editing & Batch Processing ā Perfect for photographers handling hundreds of images at once. Lightroom is part of Adobeās Photography Plan ($9.99/month), which includes Photoshop, making it a great deal. 3. Affinity Photo ā The Best Photoshop Alternative If you donāt like subscriptions, Affinity Photo is the best one-time purchase photo retouching software for Mac. Itās packed with professional tools and runs smoothly on Apple M1, M2, and M3 chips. Key Features of Affinity Photo š Advanced Retouching ā Tools like frequency separation and inpainting brush help with precise skin smoothing and object removal.š» Optimized for Mac ā Built for Apple silicon, ensuring fast performance.š° One-Time Purchase ā Costs $69.99, making it a budget-friendly alternative to Photoshop. 4. Luminar Neo ā Best AI-Powered Photo Retouching Software for Mac If you love AI-driven editing, Luminar Neo is one of the best photo retouching software for Mac in 2025. Itās beginner-friendly but powerful enough for professionals. Why Luminar Neo Stands Out š¤ AI-Powered Retouching ā Skin AI, Face AI, and Sky Replacement automate complex edits.š± Easy to Use ā Perfect for beginners who want great results without a steep learning curve.š² Flexible Pricing ā Available as a one-time purchase ($149) or a subscription ($7.99/month). 5. Capture One ā Best for Professional Photographers For studio photographers and professionals, Capture One is the best RAW image editing software for Mac. It offers advanced color grading, tethered shooting, and layer-based editing. Why Pros Love Capture One šØ Best Color Grading ā Capture Oneās color tools offer unmatched precision.šø Tethered Shooting ā Connect your camera directly for real-time editing.š¾ RAW Editing Power ā Handles large RAW files without slowing down. Capture One is available for $24/month or as a one-time license ($299). 6. Pixelmator Pro ā Best Budget-Friendly Mac Photo Editor If you want a powerful but affordable photo retouching software for Mac, Pixelmator Pro is a great choice. It offers AI-powered tools, seamless macOS integration, and a one-time purchase option. Why Pixelmator Pro Stands Out in 2025 š° Budget-Friendly ā Costs only $49.99, making it an affordable Photoshop alternative for Mac.š¤ AI-Powered Retouching ā Features like automatic background removal and ML Enhance make editing easier.š Perfect for Mac Users ā Works seamlessly with Apple Photos, making editing fast and simple. This is the best option if you need AI-powered photo editing software without a monthly subscription. 7. DxO PhotoLab ā Best for Noise Reduction & Detail Enhancement If you’re serious about image quality, DxO PhotoLab is one of the best photo retouching software for Mac in 2025. Itās designed for photographers who need advanced noise reduction and lens correction. Top Features of DxO PhotoLab šÆ DeepPRIME AI Noise Reduction ā Removes noise while keeping details sharp, perfect for low-light photography.š Advanced Lens Corrections ā Fixes distortions and sharpens images based on your camera and lens.š Great for Landscapes & Portraits ā Helps bring out natural colors and fine details. DxO PhotoLab costs $229 (Elite Edition), but itās worth it if you need professional-level image enhancement. šØ Contact Us for Professional Photo Retouching!
Steps for Photo Retouching in Photoshop in 2025

Photo retouching in Photoshop is easier and smarter than ever in 2025. With the latest tools, AI-powered features, and some classic techniques still holding strong, you can clean up a portrait, fix lighting, and make photos look amazing in just a few steps. If you’re wondering how to get started with photo retouching in Photoshop then hereās the short answer: you begin by working non-destructively and cleaning up skin and facial details. Then adjust color and lighting, enhance features with Dodge & Burn, and finally export in the right formatāeither for web or print. If you’re editing a headshot, fashion portrait, or product image then this step-by-step guide will walk you through every part of the process. Ready to make your photos stand out? Letās dive right in! š What Is Photo Retouching in Photoshop? Photo retouching in Photoshop means fixing or enhancing a photo to make it look better. Itās different from general photo editing. Editing changes the whole photoālike cropping or adjusting colorsāwhile retouching focuses on fine details. Think of it like giving a picture a mini-makeover. š Youāve probably seen it done in fashion shoots, LinkedIn headshots, or product images on Amazon. People use retouching to smooth skin, remove blemishes, whiten teeth, and even fix lighting problems. Photoshop now includes AI-powered tools that help you retouch faster and smarter. For example, the Neural Filters use artificial intelligence to smooth skin or adjust facial expressions with a simple slider. Need Help with Photo Retouching? š Contact Us! Also, non-destructive workflows like using smart objects and adjustment layers mean you can make changes without damaging the original image. Why do people care so much about image enhancement? Because good photos build confidence. A clean headshot helps you get that job. A sharp product photo helps you sell more online. And letās be honestāsharing a glowing portrait just feels good! Retouching also helps photographers and editors create a consistent look. Whether itās for Instagram, a personal blog, or a fashion magazine, small tweaks go a long way. Common Use Cases: So now that you know what retouching is all about, letās dive into setting up your workspace. List of the best photo retouching software for Mac in 2025 Steps for Photo Retouching in Photoshop Prepping Your Workspace for Retouching Photos Before we start editing, we need to set up your Photoshop space properly. Donāt worryāit only takes a few steps. First, open Adobe Photoshop and go to the top menu. Click on Window > Workspace > Photography. This layout is perfect for photo editing and has everything you need right in front of you. Next, import your image. You can drag and drop a RAW or JPEG file into Photoshop. If youāre using RAW then Photoshop will launch Camera Raw. This is where you can adjust exposure, white balance, and sharpness before the image opens. Hereās a key tip for working smart: Always duplicate your background layer. Just press Ctrl+J (Windows) or Cmd+J (Mac). This lets you work on a copy and keeps the original safe in case you mess up (which we all do sometimes š ). Also, get comfortable with layers. Layers are like transparent sheets stacked on top of your image. You can add edits, effects, and text. All these without changing the original photo. Itās a lifesaver. Another must-do is using adjustment layers. These are tools like Brightness/Contrast, Levels, or Hue/Saturation. Instead of changing the image directly, they float above it so you can tweak them anytime. Lastly, I recommend turning your main image layer into a Smart Object. Just right-click the layer and choose āConvert to Smart Object.ā This keeps the quality high, even if you resize or apply filters. Workspace Checklist: Want a deeper dive? Check out How to Set Up a Photoshop Workspace in the video below: ⨠Basic Skin Retouching Now weāre getting to the fun partāmaking your skin look smooth, clean, and real. One of the first steps for photo retouching in Photoshop is removing blemishes. Donāt worry, Iāll keep it beginner-friendly. Start with the Spot Healing Brush Tool. Itās perfect for small pimples, dust spots, or marks. You can find it in the toolbar on the left, or press J. Make sure you use a soft brush and zoom in so you donāt miss anything. Just click over a spot and Photoshop will blend it into the surrounding skin. Itās like magic. ⨠For more stubborn spots, switch to the Clone Stamp Tool. This lets you copy one part of the skin and paint over another. Hold Alt (or Option on Mac) to select a source area. Then brush over the area you want to fix. Hereās my pro tip: zoom in close and take your time. Use small strokes and always sample from nearby skin for the best results. Also, switch between the two tools depending on the issue. Remember: Donāt go overboard. Itās easy to get carried away and blur everything. The goal is to make the skin look naturalānot plastic. Keep some texture so the person still looks like themselves. Bonus Tip: Use a before-and-after layer. Duplicate your retouched layer, hide it, and then toggle it on/off to see the difference. It helps keep your edits balanced. Tools to Use: Semantic keywords like blemish removal, retouch skin, and spot correction are what this section covers fully. Learn how you can outsource photo retouching For Ecommerce Business š Smoothing Skin Without Losing Texture Smooth skin is great but only when it still looks like skin. š So how do we do that without turning someone into a wax figure? Letās start with a pro technique called Frequency Separation. Donāt be scared by the name. Iāll explain it in a simple way. Frequency Separation splits the image into two layers: That means you can smooth out skin tones without messing up the texture. There are free actions you can download online that set this up for you. Or you can follow a guide like this one from Piximperfect on