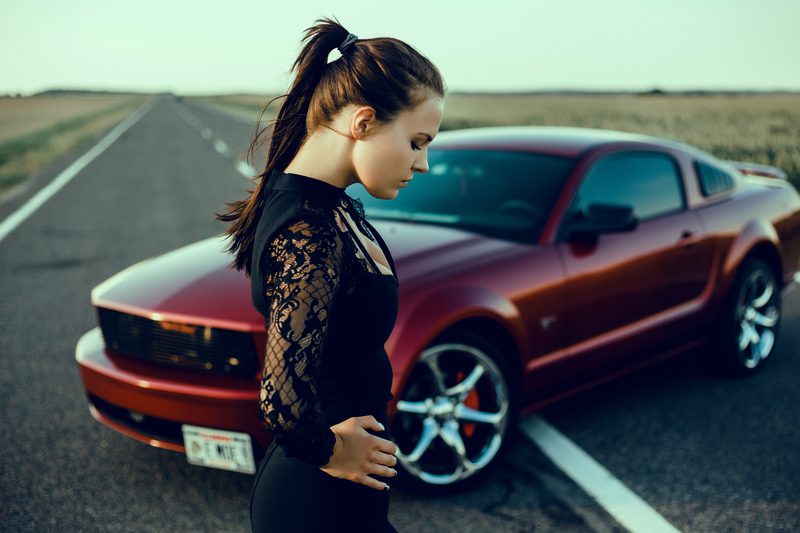
Want to learn how to edit car photos in Lightroom Mobile? If you’re trying to perfect shots for Instagram or sell a car with eye-catching images then I’ve got you covered.
Lightroom Mobile is a powerful and easy-to-use app that brings professional editing tools right to your phone. You don’t need to be an expert to get started.
In this blog, I’ll walk you through how to edit car photos in Lightroom Mobile step by step. You will be able to fix lighting issues, enhance colors, and remove distractions by going through this guide.
By the end of this guide, you’ll be able to transform your car photos into polished and professional-looking images in just a few taps.

Why Edit Car Photos in Lightroom Mobile?
A picture really is worth a thousand words in the case of cars. A great car photo doesn’t just show the vehicle but it tells a story.
Reflections on the windows, the gleam of the paint, and the sleek lines of the body all come together to create a visual masterpiece. But unedited photos often fall flat.
Editing car photos in Lightroom Mobile helps you to bring out the best in every detail. The app makes your car photos look exceptional. This is really important for:
- Social media posts: These will help you to grab attention and show off your ride.
- Car listings: Increase buyer interest with clear and appealing images.
- Personal projects: Create photo albums that make your car memories stand out.
Benefits of Using Lightroom Mobile for Car Photos
Why choose Lightroom Mobile? Simple—it’s effective, portable, and affordable.
- Ease of use: The app is designed for all skill levels. Its intuitive interface makes editing straightforward.
- Advanced features: You can adjust colors, lighting, and even remove reflections with tools like tone adjustment and masking.
- Cost-effective: You get desktop-quality features without breaking the bank.
Lightroom Mobile is a go-to tool for car photo editing for beginner to seasoned pros.
Preparing Your Car Photo for Editing
Getting your car photo ready is important before you dive into editing. A good shot makes editing easier and ensures the final result looks amazing.
Capture the Perfect Shot Before Editing
You need a well-composed photo to start. Here are some quick tips:
- Find the right lighting: The best time for car photography is during the golden hour (early morning or late afternoon). This soft light also reduces harsh reflections and gives your car a natural glow.
- Pick the right angles: You can take shots from a lower perspective to highlight the car’s shape. Also, experiment with side angles and close-ups to emphasize details like wheels or headlights.
- Reduce reflections: You should avoid shooting in locations with distracting reflections like crowded parking lots. Try using a clean and open space.
- Clean the car: A clean car ensures no dust, smudges, or dirt ruin the image’s look.
Transferring Photos to Lightroom Mobile
Once you’ve captured your shot, the next step is to move it to Lightroom Mobile. Here’s how you can do that:
- Importing photos: Open Lightroom Mobile, click the “+” button, and import your photos directly from your phone’s gallery. You can also import from cloud storage like Google Drive or Dropbox.
- Organizing photos: You should also create folders or albums to keep your car images sorted. This makes editing multiple photos easier and saves time.
You’re setting up your photos for a smoother editing process by following these steps. Also, you’re already one step closer to professional-quality car images with Lightroom Mobile’s tools.
Now that your photos are ready, let’s move on to the exciting part—editing! In the next section, I’ll take you through a step-by-step guide on how to edit car photos in Lightroom Mobile.
👉 Related Reads:
How to Edit Car Photos in Lightroom On Mac And PC
Stay tuned as we explore each step in detail!
Step-by-Step Guide: How to Edit Car Photos in Lightroom Mobile
Editing car photos can feel like a big task but it’s actually pretty simple with Lightroom Mobile. Here’s my step-by-step guide to help you create professional-looking car photos with ease.
Step 1: Basic Adjustments of Car Images
The first step to editing any car photo is fixing the basics. These adjustments are the foundation for enhancing your image. So let’s start here.
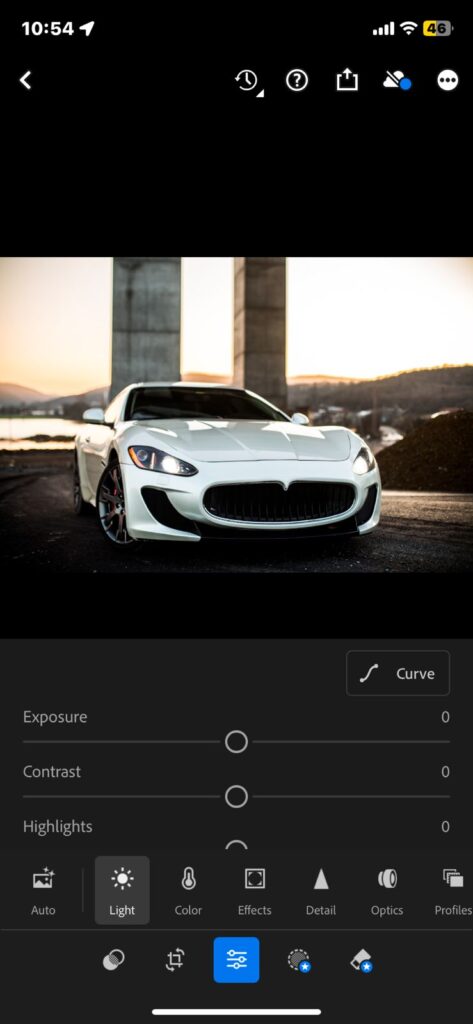
- Adjust Exposure:
If your car photo is too bright or too dark then drag the exposure slider left or right to balance it out. Overexposed images lose detail, while underexposed ones look dull. A well-balanced exposure makes the photo vibrant and clear.
- Fine-Tune Contrast:
Increase the contrast to make the car’s edges and details stand out. This also makes the car look sharp and defined while creating a balance between light and dark areas.
- Fix Highlights and Shadows:
Use the highlights slider to tone down bright spots like sunlight bouncing off the car’s hood. You should also adjust the shadows slider to bring out details in the darker areas. Such as under the wheel arches.
- Enhance Clarity:
Drag the clarity slider up slightly to add texture and detail. This works great for the car’s surface. It also emphasizes paint job and sleek design without making the photo look harsh.
You’ll have a balanced image ready for more creative enhancements by completing these adjustments.
Step 2: Color Grading and Enhancements for Car Photos
Now let’s make those colors pop! A car’s paint job often serves as its defining feature. So let’s ensure it stands out.
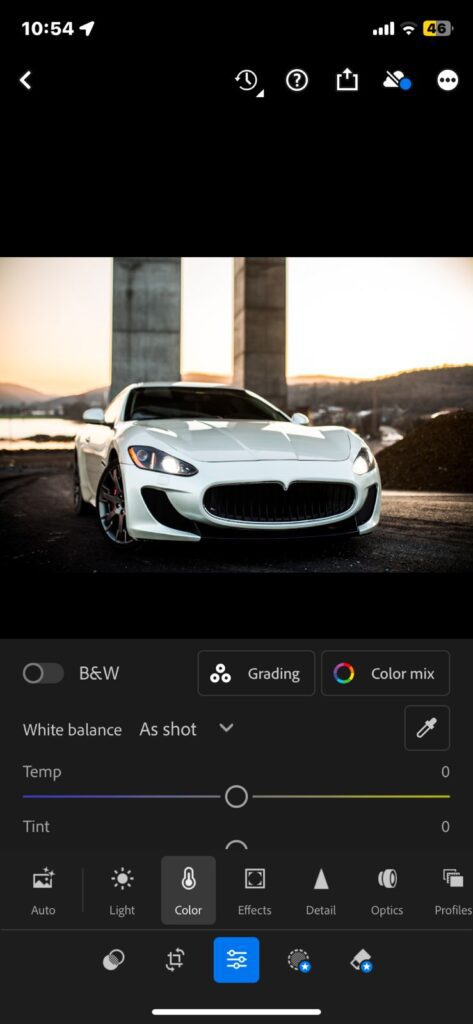
- Adjust White Balance:
You can start by correcting the white balance. Tap on the “Temp” and “Tint” sliders to ensure the colors in your image match what you saw in real life. This is helpful for bright reds, blues, and metallic shades.
- Boost Saturation and Vibrance:
Increase the saturation slider to make colors more vivid. But don’t overdo it. Instead, you can use vibrance to enhance muted colors while keeping the brighter areas natural. This makes the photo look polished without appearing fake.
- Tweak the HSL Sliders:
The HSL (Hue, Saturation, and Luminance) panel is another great tool. You can use it to adjust the color tones individually. For example, you can make the car’s paint more vibrant while keeping the background subtle.
- Adjust the hue to refine the car’s color (e.g., make a red car look deeper or more orange).
- Use saturation to make specific colors more intense.
- Tweak luminance to brighten or darken certain hues for a balanced look.
Proper color grading transforms an ordinary car photo into something truly stunning.
Step 3: Removing Unwanted Reflections and Glare From Car Image
Cars naturally reflect their surroundings. This can create distracting glare or unwanted reflections. Let’s clean that up.
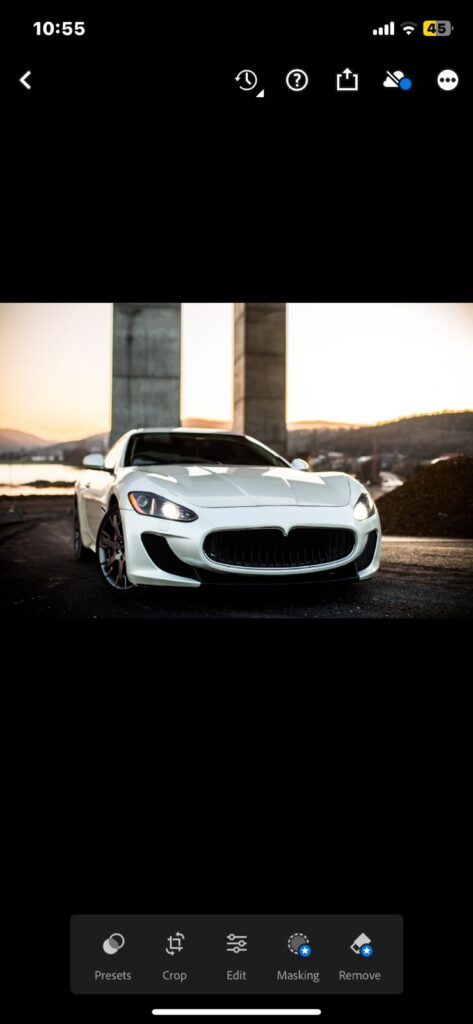
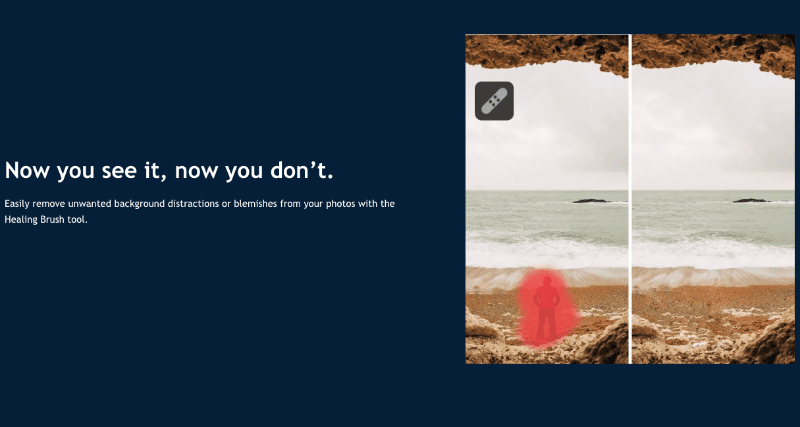
- Use the Healing Brush:
Tap on the Healing Brush tool and carefully remove any distracting reflections or blemishes. For example, if you see a person or object reflected on the car’s surface then you can eliminate it with a few taps.
- Fix Glare on Windows:
You can adjust the brush size and opacity to remove harsh glares on the car windows or shiny body parts. This makes the car look professional without losing its natural charm.
Taking a few minutes to clear up these distractions can make your photo look much more professional and focused.
By now you should have mastered the basics. It’s time to dive into the actual editing process.
In the next section, I’ll show you how to edit car photos in Lightroom Mobile step by step. I will also break down each tool and feature to create stunning results. Stay tuned for more!
Step 4: Enhancing Car Background and Surroundings
A great car photo isn’t just about the car. It’s also about how the background complements it. Here’s how you can enhance the background and make your car stand out in Lightroom Mobile.
- Adjust Background Brightness:
Use the masking tool to select the background and lower its brightness. This creates a contrast that highlights the car. Be careful not to darken the background too much. Because it can look unnatural.
- Blur Distractions:
If there are distracting elements like people, buildings, or trees then use the masking tools to blur those areas. This keeps the focus on the car. Also makes the overall photo look clean and professional.
- Balance Colors:
Use the color adjustment sliders to harmonize the background colors with the car. For example, if the car is bright red then neutralize overly warm tones in the background to avoid clashing colors.
Taking a few extra steps to enhance the surroundings ensures the car becomes the star of the photo.
If you’re looking for car backgrounds then check out these amazing car background images for editing.
Step 5: Adding Dramatic Effects on Car Photos
If you want to give your car photos a dramatic edge then Lightroom Mobile has plenty of tools to make it happen.
- Selective Edits for Details:
Use the Selective Adjustment tool to highlight specific car features. Such as the headlights, wheels, or grille. Increasing the brightness or clarity of these areas makes the car look sharp and dynamic.
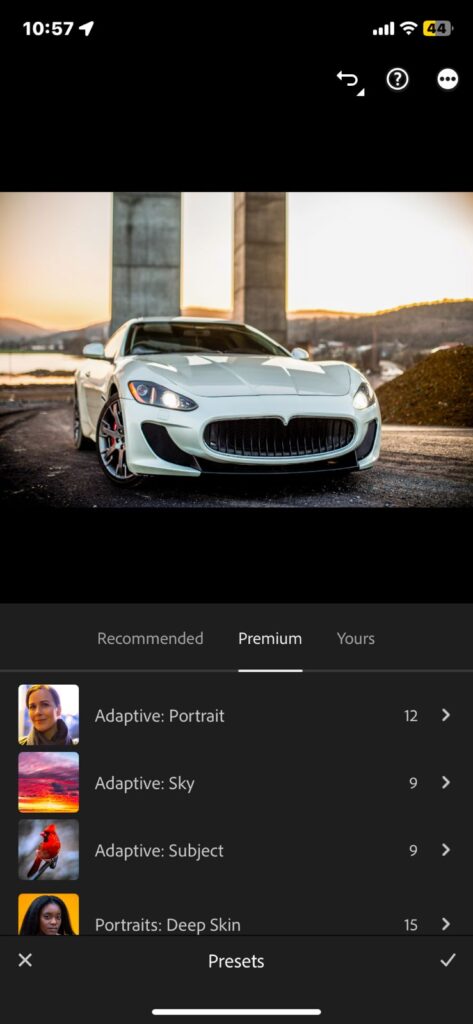
- Apply Lightroom Presets:
Presets are a huge time saver. They let you quickly apply a good look to your photos. For car photos you can use presets designed for automotive photography.
These presets can enhance shine, contrast, and color in one click. There are plenty of free and paid Lightroom presets online. Just search for ones that suit your style.
- Add Vignettes:
A vignette effect (darkening the edges of the photo) helps draw attention to the car. You can adjust the strength so it looks natural but impactful.
For inspiration on car-specific edits, check out these Lightroom presets for cars:
Step 6: Final Touches and Exporting
The last step is polishing your photo and preparing it for sharing. Here’s how to wrap up your edits.
- Crop for Composition:
Adjust the crop to ensure the car is centered or follows the rule of thirds. A well-framed photo can make all the difference. This is really important for social media or portfolio work.
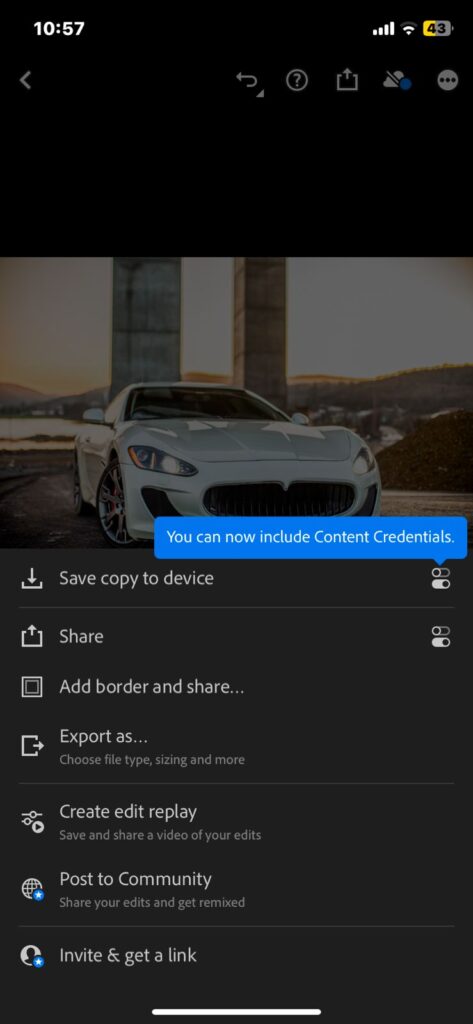
- Set Export Settings:
Choose the right export settings based on where you plan to share the photo. For Instagram, use a resolution of 1080px on the longer side.
For websites you should keep the image file size optimized for faster loading. If you’re printing then export at the highest resolution.
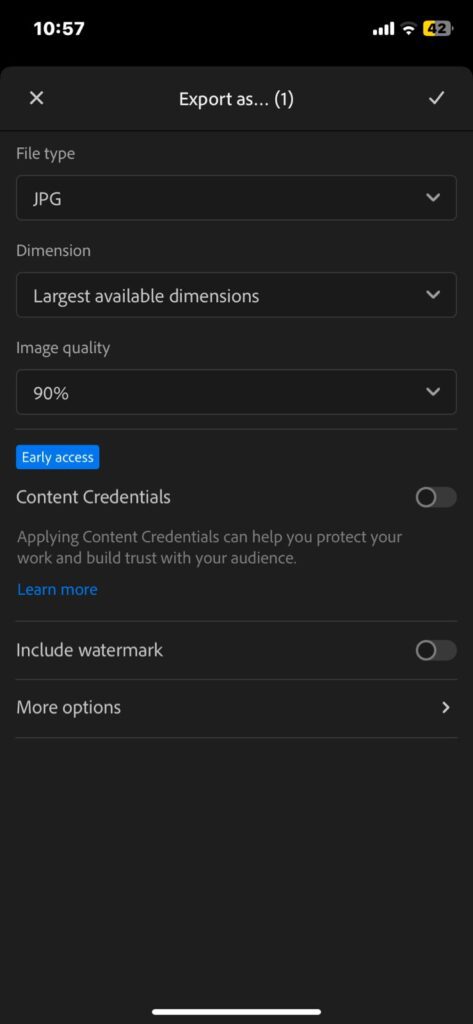
- Save and Share:
Save your final edits and don’t forget to share them! Lightroom Mobile makes it easy to directly upload photos to platforms like Instagram or Pinterest.
A perfectly edited car photo is about presenting it well too. If you’re unsure about export settings then this photo export guide can help.
By following these steps, you’ll master how to edit car photos in Lightroom Mobile and create eye-catching images every time.
Tips for Consistently Great Car Photo Edits
Creating and Using Presets for Car Photos
One of the easiest ways to save time while editing car photos in Lightroom Mobile is by creating and using presets. Presets allow you to apply a consistent look to your images with just one tap.
Start by fine-tuning an edit you like. Such as adjustiing brightness, contrast, saturation, and other settings.
Then, save these adjustments as a custom preset. You can quickly apply it to similar photos in the future this way.
For example, if you often shoot shiny cars in daylight then having a preset ready for enhancing highlights and reflections will be really helpful.
Lightroom Mobile also lets you share presets or download ones made by other photographers. Many websites offer free and premium presets specifically for car photography.
Look for presets that enhance car paint, reduce background distractions, or add dramatic effects.
Common Mistakes to Avoid
It’s easy to overdo certain adjustments when editing car photos. Over-saturating the colors might make the car look unnatural.
Over-sharpening can also create harsh edges. Especially around details like headlights or grills.
Another common mistake is ignoring small details like dust, smudges, or reflections. You can use the spot healing tool to clean up these imperfections. They might seem minor but they can make a huge difference in the final photo.
Being mindful of these common pitfalls will help you consistently create stunning car edits.
Conclusion
Editing car photos in Lightroom Mobile doesn’t have to be complicated. I’ve walked you through everything throughout this guide. Now you know basic adjustments to advanced techniques like using masks and presets.
The app simplifies editing and offer professional-level results. Lightroom Mobile has the tools you need for brightening car paint, fixing distractions, or adding drama.
Now, it’s time to put these tips into practice. Experiment with different edits, and don’t forget to share your creations in the comments. Tag us on social media using #SmartClipping for a chance to get featured!
FAQs on “How to Edit Car Photos in Lightroom Mobile”
u003cstrongu003eWhat is the best way to make car paint shine?u003c/strongu003e
You can increase the highlights and whites in Lightroom Mobile to make car paint shine. Use the masking tool to target the car’s surface and adjust clarity for added texture.
u003cstrongu003eCan I remove scratches or dents in Lightroom Mobile?u003c/strongu003e
Yes, you can use the healing tool to remove small scratches or dents. Simply zoom in, tap the area you want to fix, and Lightroom Mobile will blend it seamlessly with the surroundings.
u003cstrongu003eHow do I edit night car photos in Lightroom Mobile?u003c/strongu003e
You can increase the shadows and blacks to reveal hidden details for night photos of cars. Boost clarity and reduce noise to make the image sharper. Consider using a preset designed for night photography.
u003cstrongu003eWhich presets work best for car photography?u003c/strongu003e
Presets that enhance reflections, bring out colors, or create a dramatic contrast work best. Look for presets labeled as “car photography” or “automotive style.”

