Wondering how to take product photos for ecommerce like a pro? Looking for tips that can transform your product photos from “meh” to must-click? You’re in the right place.
Your product photos are your storefront, your handshake, and your salesperson in ecommerce. Also, shoppers rely on visuals to decide if your product is worth their time and money.
That’s why learning how to take product photos for ecommerce is so important for any online seller.
In this guide, I’ll share expert tips and simple strategies to help you capture photos that look polished, professional, and ready to convert.
If you’re just starting out or want to take your photography to the next level then I’ve got you covered. Let’s get started!
Top Professional Ecommerce Image Editing Services
Why Product Photography Matters for Ecommerce
People shop with their eyes. Studies show that 93% of shoppers consider visuals the top factor in their purchase decision. If your photos are blurry, dark, or just plain bad then it’s game over.
But with sharp, clean, and detailed product photos, you can grab attention and make your products irresistible.
Impact on Conversion Rates
Want some proof? Products with high-quality photos are 40% more likely to convert. That’s because great images answer all those little questions a buyer might have.
Shoppers have various questions in mind. What does it really look like? What’s the texture? Does the color match my expectations? Clear photos reduce doubt and build trust. This directly impacts your bottom line.
First Impressions Count
Think about this: your product photo is often the first thing a shopper sees. It’s like a virtual handshake.
If your photos look polished and professional then buyers are more likely to stick around and browse.
But if they see a poorly lit, unflattering shot then they’ll click away faster than you can say “add to cart.”
Building Trust with High-Quality Photos
Shoppers trust stores that look legit. When your photos look professional, it sends a message: you care about quality.
It also helps your brand stand out in a crowded market. If you’re selling on Amazon, Etsy, or your own site then your product photos should always reflect the quality of your products.

Expert Advice on Setting Up for Ecommerce Product Photography
Choosing the Right Equipment to Take Product Photos
You don’t need to blow your budget on a fancy camera. But having the right gear makes a huge difference.
Experts often recommend starting with a DSLR or mirrorless camera like the Canon EOS Rebel T7 or Sony Alpha a6000. These cameras are beginner-friendly and deliver sharp detailed images.
If you’re using your phone then make sure it has a decent camera. The latest iPhones and Samsung phones are great options for ecommerce photography.
Just remember to stabilize your shots with a tripod. I swear, a tripod is a game-changer. It keeps your camera steady and ensures every photo is sharp.
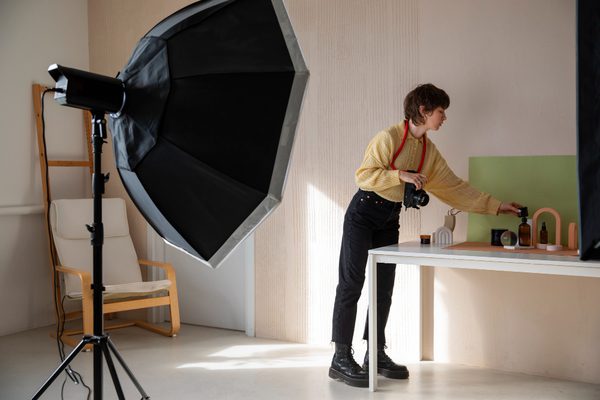
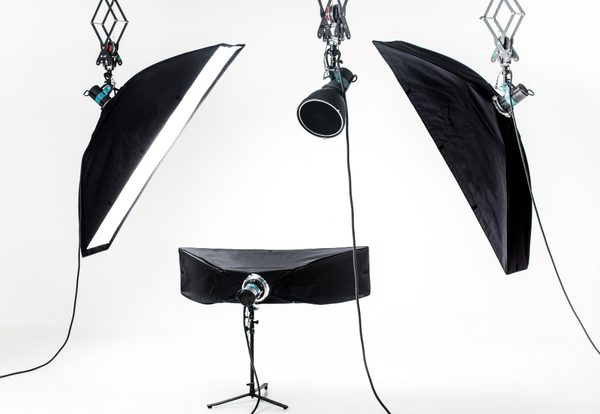
For lighting, you can’t go wrong with softboxes or ring lights. They give you even and shadow-free lighting that makes your product pop.
And don’t forget reflectors! They bounce light onto your product and help eliminate harsh shadows.
Lighting Setup for Taking Product Photos
Lighting can make or break your photos. Natural light works wonders if you’re on a budget. Place your product near a window, and use a white curtain to diffuse the light for a soft glow.
If natural light isn’t an option, artificial lighting is your best friend. A softbox or LED light setup is perfect for ecommerce photos. Experts suggest positioning your light at a 45-degree angle to the product. This setup reduces shadows and highlights textures beautifully.
For reflective products like jewelry or glassware, you’ll need diffusers to control glare. A simple DIY tip? Use a white bedsheet or paper to soften the light. It’s cheap, effective, and works like magic.
Creating a Clean Background
A clean background makes your product the star of the show. White or neutral backgrounds are the go-to choice for most ecommerce platforms. They also keep the focus on your product and create a professional look.
If you’re on a tight budget then you can use white poster boards or rolls of paper as a backdrop. For a more polished setup you should invest in a photo lightbox. It’s an all-in-one solution that gives you even lighting and a seamless background.
Also, avoid distractions in the background. Trust me, no one wants to see your kitchen counter or bedroom floor in a product photo. Keep it simple, clean, and consistent across all your images.
Pro Tip:
Bookmark helpful guides like this one from Shopify’s guide to product photography for more tips and tricks.
By the time you nail down these basics, you’ll have a setup that’s good enough to compete with big brands.
Ready to dive deeper? Let’s talk about how to actually take those killer shots in the next section!
How to Take Product Photos for Ecommerce Like an Expert
Camera Settings You Need to Know
If you want professional-looking product photos then understanding your camera settings is essential. Experts recommend sticking to manual mode for full control over your shots.
Here’s what you need to focus on:
- Aperture: You should use a higher f-stop (around f/8 to f/16) to ensure your entire product is sharp and in focus.
- ISO: Keep it as low as possible. Typically around 100 or 200, to avoid grainy images.
- Shutter Speed: A faster shutter speed (1/125 or higher) helps capture sharp images. Especially if you’re shooting handheld.
- Avoid common mistakes like relying too much on auto mode or skipping a tripod. Because this can lead to blurry or uneven shots.
For a detailed guide, check watch this camera settings tutorial.
Composition Tips for Perfect Product Shots
Composition is key when learning how to take product photos for ecommerce. A well-composed image grabs attention and keeps customers engaged.
Here are some expert tips:
- Rule of Thirds: Imagine a 3×3 grid over your photo and position your product along these lines for a balanced look.
- Symmetry: Center the product for a clean and professional feel. Especially for symmetrical items like bottles or boxes.
- Leading Lines: Use lines (like table edges or props) to draw attention to the product.
- Balance empty space to avoid clutter and frame the product effectively.
How to Choose the Right eCommerce Image Retouching Company
Angles Matter in Taking Product Photos
The right angle can make all the difference. Experiment with these:
- Top-Down: Perfect for flat-lay shots, especially for items like clothes or accessories.
- Side View: Ideal for showcasing dimensions and details.
- Diagonal Shots: Adds a dynamic touch and depth to your image.
The Importance of Focus and Sharpness
Nobody wants to buy a product they can’t see clearly. That’s why you should always ensure your images are sharp and detailed.
- Use focus stacking for products that need depth, like jewelry or intricate designs.
- Capture macro shots to highlight textures, stitching, or other fine details.
Expert Tips for Styling Your Products
How to Make Your Products Stand Out
Styling is where you can get creative. But the product should always remain the star.
Here’s how experts do it:
- You can use props that complement the product but don’t overshadow it. For example, a mug might pair well with coffee beans or a cozy napkin.
- Add lifestyle elements to show how the product is used. For example, a yoga mat might look great with someone stretching on it.
Product Positioning for Taking Photos
Positioning is critical to highlight the product’s best features.
- Use angles that showcase the product’s size, shape, and texture.
- Rotating platforms are excellent for creating 360-degree views. This works really well for ecommerce platforms like Amazon.
Pro Tip:
Keep the styling consistent with your brand. For example, if you’re selling eco-friendly products then use natural props like wood or greenery.
7 Best Image Retouching Companies to Enhance Your Photos
Expert-Recommended Editing Tips for Ecommerce Photos
Post-Production Editing to Perfect Your Product Photos
Editing is where your product photos go from good to great. Start with basic adjustments:
- Adjust exposure, contrast, and sharpness to make your product pop.
- Remove imperfections like dust, wrinkles, or scratches using tools like the healing brush in Photoshop.
- Ensure color correction so that your product looks the same as it does in real life. Nothing frustrates customers more than inaccurate colors.
Using Photo Editing Software For Product Images
Choosing the right software depends on your skill level. Experts recommend:
- Adobe Photoshop and Adobe Lightroom for advanced product photo editing.
- Free tools like Canva or Snapseed are great if you’re just starting out.
Check out the Best Ecommerce Image Editing Software for Flawless Product Photos.
Consistent Photo Editing Style
Consistency builds trust and creates a cohesive shopping experience.
- Use the same color grading, filters, and lighting adjustments across all product photos.
- Match your editing style with your brand’s identity. For example, vibrant and colorful for kids’ products, or minimalist and clean for tech gadgets.
By following these tips, you’ll master how to take product photos for ecommerce and create stunning images that convert casual browsers into loyal buyers.

Expert Insights on Ecommerce Product Photography for Specific Niches
How to Take Product Photos for Fashion Ecommerce
Taking product photos for fashion items like clothing, accessories, and jewelry requires a mix of technical skills and creativity. You should focus on creating clean and flattering shots for clothing.
I recommend using soft and even lighting to avoid harsh shadows and wrinkles. A model or mannequin can help showcase the fit and style of the garment. But flat-lay shots work great for casual looks or detailed items.
When photographing jewelry, macro shots are your best friend. They allow you to highlight intricate details like gemstones, patterns, or engraving. Also, make sure the lighting is diffused to avoid reflections, and use a solid, neutral background to keep the focus on the jewelry.
How Fashion Retouching Supercharge Your Brand Identity
Product Photography for Tech Gadgets and Electronics
Photographing tech gadgets and electronics requires precision. Highlight the product’s key features and details like buttons, ports, or sleek designs. You can also use a plain white background to ensure the gadget pops and avoid clutter in the frame.
Angle shots are super important here. For example, if you’re photographing a smartphone, capture the front screen, the back design, and a side view to showcase its thickness. Including a hand holding the gadget can also help buyers visualize the size and usability.
How to Photograph Food and Beverage Products
Food photography is all about making the viewer’s mouth water. Start with natural light or soft artificial light to highlight the textures and colors. You can also use fresh ingredients and props like utensils or napkins to tell a story.
Pay attention to angles. Overhead shots work well for flat dishes like pizzas. On the other hand, a 45-degree angle is better for tall dishes like burgers or cakes.
Don’t forget about the backgrounds. A rustic wooden table or a clean marble slab can make your food photos look professional.
If you’re new to food photography then this guide for beginners is a great starting point.
Product Photography for Home Goods and Furniture
Lifestyle shots work best for home goods and furniture. Show the product in a real setting, like a couch in a living room or a lamp on a bedside table. This also helps customers imagine the product in their space.
Wide-angle shots are essential for larger items. They capture the product’s full dimensions. If you’re working with smaller decor items then use close-up shots to show textures or patterns. Make sure the colors are accurate. Especially if the product comes in multiple shades.
Common Mistakes to Avoid When Taking Product Photos for Ecommerce
Underexposure and Overexposure
Lighting can make or break your product photos. Underexposed photos look dark and unappealing, while overexposed ones lose detail.
Always check your exposure levels before snapping the shot. A light meter or histogram on your camera can also help you nail the right balance.
Poor Background Choices
A cluttered or busy background distracts from the product. Stick to simple and clean backgrounds like white or neutral tones.
This also ensures that the focus remains on the product itself. If you want to add some creativity then use props that complement your product without stealing the spotlight.
Not Using the Right Angles for Product Photography
Shooting products from unflattering angles can distort their look. For instance, photographing a tall product from a low angle might make it look bulky.
Experiment with top-down, side, and 45-degree angles to find the most flattering shot.
Inconsistent Styling and Product Photo Quality
Consistency matters a lot in ecommerce. If your product photos have varying backgrounds, lighting, or quality then it can confuse customers and damage your brand’s reputation.
Stick to a consistent setup and editing style across all your photos.
Skipping Post-Processing
Editing is not just about fixing mistakes; it’s about enhancing the product. You can use tools like Photoshop or Lightroom to adjust exposure, remove imperfections, and correct colors. Skipping this step can also leave your photos looking unfinished.
Discover the best size for ecommerce product images
Optimizing Your Product Photos for Ecommerce Platforms
Resizing and Compressing Images for Faster Loading
Large image files can slow down your website which frustrates customers. Resize your images to fit the platform’s requirements, and compress them using tools like TinyPNG or ImageOptim. This ensures fast loading without sacrificing quality.
File Formats and Resolution
Always choose the right file format for your product photos. JPEGs are great for most ecommerce photos because they balance quality and file size.
Also, use PNGs for images that need a transparent background. For resolution you should aim for 72 DPI (dots per inch) for web use. But keep the dimensions large enough to look sharp.
SEO Best Practices for Ecommerce Product Photos
Optimize your product photos for search engines to improve your site’s visibility. You should use descriptive file names like “red-leather-jacket.jpg” instead of generic names like “IMG12345.jpg.”
Also add alt text to every image. Such as using keywords like “how to take product photos for ecommerce.” This helps with accessibility and boosts your SEO.
Don’t forget to write captions. A short caption describing the product and its key features can improve user engagement and provide more context.
For more tips, check out this detailed guide on ecommerce photo SEO.

Case Studies: How Experts Achieved Success with Ecommerce Product Photos
Let’s dive into some real-world success stories to see how experts used product photography to grow their ecommerce businesses. These case studies highlight how taking product photos for ecommerce the right way can make a huge difference.
Expert Case Study 1: Fashion Retailer – LuxeLook Clothing
LuxeLook Clothing is a mid-sized online fashion retailer. They saw a massive jump in conversions by upgrading their product photography. They had been using basic images taken with inconsistent lighting and poorly styled clothing.
After hiring a professional photographer, LuxeLook implemented clean, studio-style images. They focused on creating flattering shots of their clothing by:
- Using even lighting to eliminate harsh shadows.
- Employing mannequins and models to showcase fit and movement.
- Styling each piece to reflect how customers would wear it.
Within three months, LuxeLook’s sales increased by 35%, and their return rate dropped by 20%.
Customers said the photos made it easier to understand the fit and texture of the products. If you want to learn more about styling clothes for ecommerce, this guide offers some great insights.
Expert Case Study 2: Tech Product Seller – GadgetSphere
GadgetSphere is a store specializing in electronics like headphones and smartwatches, struggled with low customer trust. Their old product photos were blurry and failed to highlight the key features of their products.
To address this, they invested in high-resolution images that showcased every product angle.
Here’s what they did:
- They captured close-up shots to highlight details like ports, buttons, and build quality.
- Used neutral backgrounds to make the products stand out.
- Incorporated lifestyle photos showing the gadgets in real-world use, such as a smartwatch on someone’s wrist during a workout.
The result? GadgetSphere’s sales grew by 42%, and their bounce rate dropped by 18%.
High-quality photos helped establish trust and reassured customers about product quality. For more tips on photographing electronics, this resource can help.
Expert Case Study 3: Handmade Goods Store – RusticCharm Creations
RusticCharm Creations, an Etsy shop selling handmade candles and pottery. They didn’t have the budget for professional photography. The owner, Mia, decided to learn how to take product photos for ecommerce on her own.
With a small DIY setup she made significant improvements:
- She used natural light by setting it up near a window.
- She invested in a lightbox to create consistent white backgrounds.
- For editing, she used free tools like Canva to adjust brightness and remove any imperfections.
Mia also added lifestyle shots, such as her candles on a cozy coffee table surrounded by books.
After making these changes, RusticCharm Creations experienced a 25% increase in sales in just two months.
Also, her customer reviews started mentioning how much they loved the product photos! If you’re a small business owner, this Etsy photography guide can help you get started.
Key Takeaways
These case studies prove that great product photography can directly impact conversions, build trust, and increase sales. If you run a large fashion retailer or a small handmade goods shop then learning how to take product photos for ecommerce is worth the time and effort.
With the right approach, even DIY photos can look professional and drive results.
Conclusion: Transform Your Ecommerce Business with Expert Product Photos
If you’ve made it this far then you know how important product photography is for ecommerce success. High-quality product photos do more than just look pretty. They also help your customers trust your store and feel confident in their purchases.
By learning how to take product photos for ecommerce, you can create visuals that grab attention, showcase your products, and ultimately boost sales.
The expert tips shared throughout this blog – like using natural light, capturing multiple angles, and editing for consistency are simple steps anyone can follow. Even if you’re on a tight budget, a little effort can go a long way in improving your photos.
Focusing on professional-looking product photos builds trust, makes your store stand out, and keeps customers coming back. So why not start experimenting with the tips I shared today?
I’d love to hear from you! Have you tried taking your own product photos, or do you prefer hiring a pro? Share your experiences in the comments or feel free to ask me any questions. And if you need professional help with your product photos, don’t hesitate to reach out to Smart Clipping!
FAQs About “How to take product photos for ecommerce”
What Camera Do I Need for Ecommerce Product Photography?
You don’t need a fancy DSLR to start. Many beginners use their smartphones, as most modern devices have great cameras. But if you want more control, entry-level DSLRs like the Canon EOS Rebel series are a good investment.
How Do I Take Great Product Photos on a Budget?
Start with natural light. Use a clean background (a white sheet works) and invest in basic props like a tripod. Free editing tools like Canva or GIMP can help you polish your photos without spending a dime.
Can I Use My Phone for Ecommerce Photography?
Yes, absolutely! Smartphones today can capture high-quality images. Just make sure you adjust your settings for sharpness and use good lighting. For tips, check out this guide to taking product photos with your phone.
How Do I Ensure My Product Photos Are Consistent Across My Store?
Use the same setup for all your photos. This includes the same background, lighting, and camera settings. Consistency creates a professional look and builds trust with your audience.
Do I Need a Professional Photographer for My Ecommerce Store?
It depends on your budget and goals. If you can afford it, hiring a professional can save you time and deliver amazing results.


