Let me tell you—when I first started photographing my jewelry, I had no idea how much a good photo or video could boost sales. I thought my pieces would speak for themselves, but the truth is, customers can’t touch or try on your jewelry online. They rely entirely on visuals.
High-quality images and videos showcase the sparkle, detail, and craftsmanship of your pieces. They build trust and help customers imagine wearing your creations.
But here’s the challenge: capturing tiny details, shine, and textures isn’t easy. Reflections, shadows, and focus issues can ruin a shot. That’s why I created this guide—to share what I’ve learned about how to take jewelry photos and video that truly showcase your work.
In this post, I’ll cover:
- Step-by-step instructions for photographing and filming jewelry
- The best tools and setup for stunning visuals
- Pro tips to make your pieces shine
Whether you’re a small business owner, Etsy seller, jewelry designer, or DIY enthusiast, this guide is for you. Let’s get started!
 1")
The Basics of Jewelry Photography and Video
Why Jewelry Is Hard to Photograph and Record
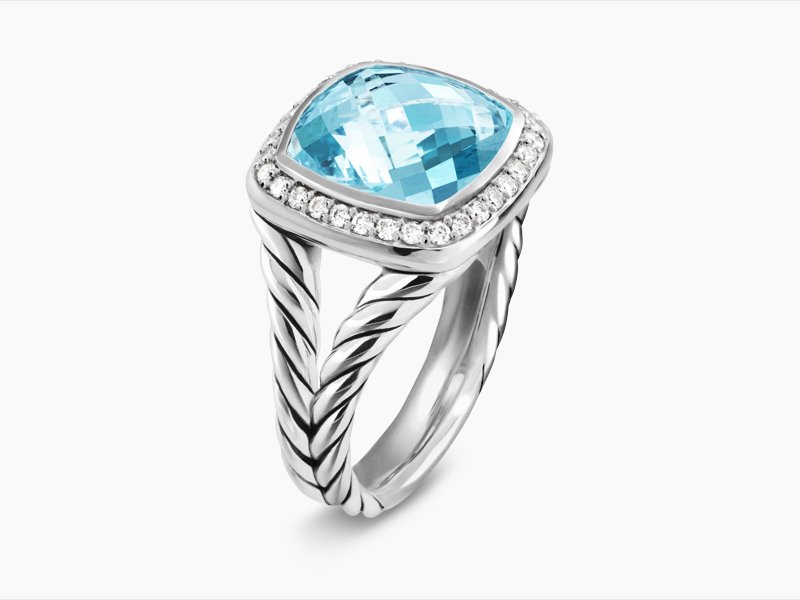
Jewelry is small, shiny, and detailed. These qualities make it beautiful but also challenging to capture. Reflections can cause glare, and tiny details require precise focus.
https://www.brides.com/gallery/wedding-ring-photo-ideas
Common Mistakes Beginners Make
I’ve made these mistakes myself:
- Using harsh lighting that creates unwanted reflections
- Choosing cluttered backgrounds that distract from the piece
- Failing to focus properly, resulting in blurry images
https://www.photorobot.com/blog/jewelry-photography
Still Photos vs. Video: When to Use What
Photos are great for highlighting details and textures. Videos can show how a piece moves and catches light. Use both to give customers a complete view of your jewelry.
How to Take Jewelry Photos and Video – Step by Step
🛠️Setting Up Your Jewelry Photo and Video Space
Choosing the Right Lighting for Jewelry Photos and Video
Lighting is crucial. Natural light is soft and flattering, but not always available. Artificial light can be consistent but may require diffusers to soften shadows.
A jewelry photo light box can provide controlled, diffused lighting. It’s especially helpful for eliminating harsh shadows and reflections.
What Backdrop for Jewelry Photos Works Best?
A clean, neutral background keeps the focus on your jewelry. White is classic and versatile, while black can add drama. Gradient backgrounds can create depth.
Using props like a white jewelry stand for photos can add professionalism and context. Just ensure they don’t distract from the piece.
📷 Best Equipment for Jewelry Photos and Video
Best Camera to Take Photos of Jewelry
You don’t need the most expensive camera. DSLRs and mirrorless cameras offer great quality, but even smartphones can work with the right setup.
For example, the Canon EOS R50 is a budget-friendly option that delivers sharp results. Pair it with a good lens, and you’re set.
Best Photo Equip for Jewelry Shoots
Stability is key. Use a tripod to avoid camera shake. Reflectors can bounce light onto your piece, reducing shadows. Clamps and diffusers help control your environment.
A remote shutter or timer prevents movement when taking the shot, ensuring crisp images.
Best Macro Lens for Jewelry Photos
A macro lens captures fine details. The Canon 100mm f/2.8L Macro IS USM is a popular choice for its sharpness and versatility.
This lens offers a 1:1 magnification ratio, making it perfect for capturing the intricate details of jewelry.
https://tomcrowl.com/lenses-jewelry-photography
What mm for Macro Jewelry Photo Shoots?
Macro lenses come in various focal lengths. A 100mm or 105mm lens allows you to shoot from a comfortable distance, giving you more room for lighting. Shorter focal lengths like 60mm require you to be closer, which can be challenging with lighting and reflections.
Styling Your Jewelry for Photos and Video
When I first learned how to take jewelry photos and video, I realized that styling plays a huge role. A good setup can make your jewelry pop, while the wrong props can take away all the shine.
Using a White Jewelry Stand for Photos
I always recommend using a white jewelry stand when possible. It helps the camera focus on the details of your product. Plus, it gives your shot a clean and professional look. Whether I’m photographing a necklace or a pair of earrings, the white stand keeps the background neutral and distraction-free.
Tips to Make Jewelry Stand Out
Keep things simple. I usually go for minimal backgrounds and neutral colors. That way, the shine, texture, and design of the piece become the center of attention. A piece of black velvet or even white foam board works wonders.
Why Clean, Minimalist Props Work
Less is more—especially with jewelry. When I shoot with too many props, it just clutters the frame. A clean setup helps me highlight every sparkle, every stone, every detail. I often use small risers or boxes wrapped in paper to lift the jewelry slightly—it creates depth without stealing the spotlight.
Matching Stands to Product Type
Each jewelry type needs its own stand. For example, I use bust stands for necklaces, T-bars for bracelets, and earring cards or holders for earrings. This makes the jewelry look natural, as if someone’s wearing it.
Creative Ideas from Boho and Afrocentric Styles
If you sell bold, fashion, or Afrocentric jewelry, you might want to try something different. I get a lot of inspiration from fashion photography blogs and dreadlock fashion shots. They use earthy tones, wood, and textured fabric backgrounds.
Add hair, skin tones, or textured surfaces to give your shoot some personality. If I’m working with natural fashion jewelry, I’ll style the shoot with real models, natural lighting, or close skin-toned backgrounds to match the vibe.
Flat Lays vs. Models
I switch between flat lays and model shots depending on what I’m trying to show. Flat lays are great for detail, but models help buyers picture themselves wearing it. If you’re on a budget, flat lays work fine—but even one model photo can boost trust.
Need Help with Jewelry Photo Retouching? 📞 Contact Us!
Shooting Your Jewelry Photos
Now that styling is set, let’s talk about actually how to take jewelry photos and video that help you sell. 📸
Camera Settings That Matter
I shoot in manual mode so I can control everything. For best results:
- ISO: Keep it low (100–200) to reduce noise
- Aperture (f-stop): Use f/8 to f/16 for sharper focus
- White Balance: Match it to your light source (daylight, LED, etc.)
These settings help me get crisp images that show off even the smallest detail.
Composition Tips for Jewelry Photos
Good composition can make or break your shot. I use angles that highlight texture and depth—45 degrees is usually my go-to. I also pay attention to reflections. Jewelry is shiny, so I make sure my lights and background don’t reflect in the piece.
For detail shots, I use macro mode or a macro lens (like a 100mm). I also shoot from multiple angles: top, side, and close-up.
Focus Stacking for More Detail
Sometimes I want the entire piece in focus, front to back. That’s where focus stacking helps. I take several photos at different focus points, then merge them using software like Helicon Focus. It sounds technical, but once I got the hang of it, it really improved my shots.
Jewelry Photo Light Box Setup Tips
I love using a light box. It gives me even, shadow-free light. I place two LED lights on each side, sometimes with a top light, and then shoot through the front opening.
I recommend the Foldio3 if you want a pre-built option. But honestly, you can DIY with white foam boards and some desk lamps if you’re just starting out.
Editing for a Professional Look
Even great photos need a little touch-up. I use Lightroom and Photoshop, but you can also try Snapseed or Pixlr.
I remove dust spots, adjust brightness and contrast, and fix color tones. But I try to keep it natural. I don’t want to mislead customers, just enhance what’s already there.
Shooting Jewelry Videos That Engage Buyers
Now, let’s cover video—because knowing how to take jewelry photos and video means knowing both. 🎥
Why Video Helps Sell More
I use video to show how a piece sparkles in motion, how long it is, and how it catches the light. Static images are great, but video gives shoppers a better feel for the product.
What Kind of Videos Work Best
I usually shoot short clips like:
- 360° spin videos using a rotating platform
- Unboxing videos to show packaging and presentation
- Close-up walkthroughs highlighting details
All these help buyers get a real-life look at the product.
Lighting and Background for Video
I set up lighting just like I do for photos—soft, even, and from both sides. I try to use white or black backgrounds to reduce distractions. And I make sure the background doesn’t shift during the video.
Best Tools for Jewelry Video
For smooth video, I use a ring light, a tripod, and a rotating turntable. If I need to move the camera, I use a slider or shoot handheld with my elbows supported to reduce shake.
If I’m using my smartphone, I shoot in 4K, keep exposure locked, and use slow motion if I want to highlight the sparkle.
Optimizing Jewelry Photos and Videos for Web
Once you’ve created your images and videos, it’s time to optimize them. This part is essential if you want your media to load fast and rank better.
Best File Types and Sizes
I save most images as JPEGs and keep the file size under 500KB. If I need transparency (like a PNG of a ring), I use PNG format.
Videos? I export them as MP4s. Then I compress them using tools like HandBrake or Clideo to keep the quality but reduce size.
SEO Tips for Your Media
Here’s how I improve SEO for every file:
- Rename your files with keywords (e.g., silver-boho-ring.jpg)
- Add alt text like “close-up of sterling silver ring”
- Use video captions with key phrases
This helps Google understand what your content shows.
Where to Use Your Jewelry Media
I upload my images and videos on platforms like:
- TikTok
Each platform has its own specs, so I format content to fit. And I always write clear, benefit-driven captions and descriptions to help close the sale.
Common Mistakes and How to Avoid Them
I’ve made all these mistakes, so you don’t have to 😅
- Overediting photos: It might look cool, but buyers want to see what the piece really looks like.
- Inconsistent lighting: Switching between warm and cool lighting makes your shop look unprofessional.
- Ignoring reflections or fingerprints: Jewelry reflects everything. Always clean your piece and use gloves.
- Not showing size or scale: Use a model or a common object (like a coin) so buyers know how big or small the piece is.
Want more tips? Check out this Etsy seller photography guide for even more help on how to take jewelry photos and video that actually convert.
Pro Tips for Next-Level Jewelry Photography and Video (200–300 words)
Once I got comfortable with the basics of how to take jewelry photos and video, I started looking for ways to level up. One thing that made a big difference for me was playing with shadows and reflections. I used natural window light at different times of the day to see how it changed the look of the jewelry. Sometimes, a soft shadow behind a ring or bracelet made it feel more real and less flat.
I also began using scenes to tell a story. Instead of just putting jewelry on a plain background, I placed items like books, fabrics, or flowers to give the photos some personality. Think about the mood you want—calm, bold, earthy—and build around that.
Creating a brand mood board helped me stay consistent. I saved color palettes, model poses, and props that matched my jewelry vibe. This kept my photos and videos on the same page, no matter the platform.
When I could, I invested in equipment that would last. A better macro lens, a sturdy tripod, and a good lighting kit made a big difference without breaking the bank. If you’re just starting out, use what you have—but keep a wishlist for gear as your business grows.
👉 Want more ideas? I found this guide on jewelry photography lighting by Pixc really helpful when I was experimenting.
Conclusion + Final Checklist
So, let’s wrap this up! Now you know how to take jewelry photos and video with more confidence. From choosing the right background and lighting to learning about camera settings and angles, you’ve got a strong foundation.
My biggest tip? Start simple. Use natural light, a clean surface, and your smartphone. Don’t wait for perfect gear—practice helps you improve more than any fancy tool.
Here’s a quick shoot day checklist I use to stay on track:
✅ Clean jewelry (no dust, fingerprints, or smudges)
✅ Proper lighting (natural or soft white for true colors)
✅ Clear background (avoid clutter or harsh patterns)
✅ Sharp focus (use a tripod or keep your hands steady)
✅ Consistent style (stick to your brand mood board)
💡 If you’re planning to edit afterward, check out this list of the best jewelry photo editing tools to keep your images sharp and natural-looking.
Taking great product shots doesn’t need to be hard. With a bit of planning, a clean setup, and some practice, you’ll be creating jewelry content that connects with buyers—and helps you sell more.