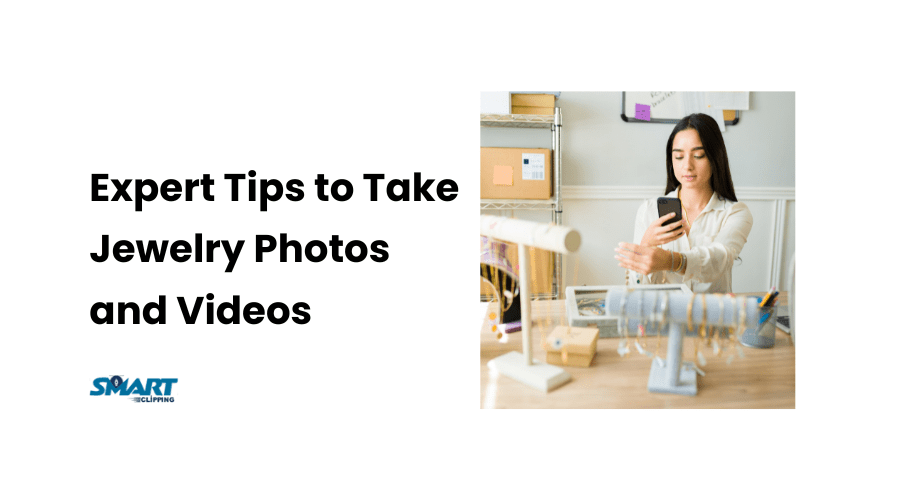
Taking photos of jewlery is already tricky. But when you add a model into the frame, things get more complicated. The sparkle, the reflection, the skin tones and the shadows. There’s a lot to think about.
If you’ve ever tried to photograph a necklace and ended up with blurry gems or distracting backgrounds then you’re not alone.
Jewlery needs to shine, literally and visually. And when it sits on a person, everything from their skin to their shirt color can either help or hurt the final shot.
What You’ll Learn in This Guide
In this guide, I’ll walk you through how to take photos of models in jewlery that look professional. This is really helpful if you’re shooting for your personal brand, your Etsy store, or a client.
I’ll cover lighting, posing, gear, styling, and even editing. I’ll also throw in real examples like vintage jewlery photo shoot ideas and stock photo girl taking off jewlery type moments that feel natural and sell better.
Who This Guide Is For
If you’re just getting started then don’t worry. This post is beginner-friendly. If you’re a content creator, photographer, or even a jewlery brand owner then you’ll find practical tips here that’ll make your next shoot a whole lot smoother.
How to Take Photos of Models in Jewlery – Part by Part
Part 1: Setting Up for Success Before the Shoot
💍 Choosing the Right jewlery for Your Shoot
Before I even pick up my camera, I always decide what kind of jewlery works for the shoot.
Statement pieces like chunky necklaces or oversized earrings usually pop best in editorial shoots. On the other hand, minimal pieces like dainty rings or studs are great for close-ups or soft lifestyle shots. If you’re doing a themed concept, go all-in on it.
For example, planning a vintage jewlery photo shoot? You should think about adding pearls, brooches, and warm-toned props.
👉 Pro tip: Match the jewlery to your model’s skin tone and outfit. Silver looks great on cooler tones. On the other hand, gold pops on warmer tones.
Need inspiration? Check out some Pinterest vintage jewlery shoot boards for visual styling ideas.
👩🦱 Model Selection and Styling Tips
Choosing the right model matters more than most people think. Jewlery looks different on every person. That’s why I always try to include diverse skin tones and face shapes in my shoots. This not only makes your portfolio richer but also helps customers see themselves in the photos.
When it comes to styling just keep it simple. I like neutral makeup and hair pulled back for earrings. For necklaces, off-shoulder tops or deep necklines work best.
If your model feels awkward then the jewlery will never shine. So I spend time making my model feel confident. I chat with them, play music, and show them shots as we go. It’s about creating a comfortable vibe, not a stiff one.
 1")
💡 Lighting Setup Basics for Jewlery on Models
Lighting can make or break a jewlery photo. I prefer natural light when I can get it—think soft window light in the morning or late afternoon. But if I’m indoors, I use diffused artificial lighting like softboxes or LED panels.
The key is avoiding harsh shadows and blown-out highlights. Sparkle is good. Glare is not.
Want a more dramatic feel? Try doing black and white photos of jewlery. These can look super classy, especially with high-contrast lighting. Just make sure the jewlery still stands out.
🪞 Backgrounds & Props That Compliment jewlery
I always think of the background as the quiet supporter of the photo. You don’t want it to compete with your piece.
If you’re doing product and model shots in the same session, using a white jewlery stand for photos is a great idea. It keeps things clean and lets the jewlery take center stage. Then, once it’s on the model, you can switch to lifestyle shots.
Textures like velvet, stone, or silk work great for close-ups or themed photos. They add richness without stealing the spotlight.
For example, if you’re photographing old crystal jewlery, a textured black or navy background really makes it shine.
📞 Contact Us for Professional Jewlery Photo Retouching and Editing!
Part 2: Camera Gear and Shooting Techniques
📷 Best Camera Settings for Taking Photos of jewlery
You don’t need a $5,000 camera to get great shots—but you do need the right settings.
For jewlery, I usually shoot in manual mode. I keep my aperture between f/4 and f/8 to keep both the jewlery and part of the model in focus. Shutter speed should be fast enough to avoid motion blur. Also, ISO should be as low as possible. Experts suggest to keep it under 400—to avoid grain.
Use a macro lens if you have one. It helps capture fine details, especially for ethnic jewlery necklace photos or detailed rings.
Also, always check for reflections. Jewlery reflects everything—your camera, your face, the ceiling. That’s why you need to Position your lights carefully and use white boards or reflectors to block distractions.
🎯 Shooting Angles That Highlight Both Model and jewlery
When I shoot necklaces, I usually go for a mid-shot or chest-up frame. For earrings, I shoot from the side or just above the shoulder line. Rings? Hand close-ups or mid-body shots showing natural hand gestures work best.
If the jewlery is cultural, like ethnic jewlery necklace photos, I give extra attention to the pose. I try to keep the look respectful, elegant, and centered on the piece.
Focus is everything. I use single-point autofocus and always place the point on the jewlery. If your background is distracting, lower your aperture for some nice blur.
Need examples? Look at editorial jewlery photos on Vogue for angle and pose inspiration.
🎬 Working with Motion and Emotion
I love when a jewlery shot tells a story. Instead of just asking my model to stand still, I ask them to adjust their earring or clasp a necklace. These little moments feel real. It’s why stock photo girl taking off jewlery images work so well. Because they feel like life, not just ads.
I always include close-up hand shots too. These bring in emotion and intimacy that connect with the viewer. A ring shot with the model gently brushing her hair or touching her face says so much more than a static pose.
Emotion sells. And that’s the real secret to take photos of models in jewlery—make it feel human.
 2")
Part 3: Posing and Directing Your Model
Natural Poses That Highlight Jewlery
When I shoot models in jewlery, I always start with the basics. Rings, earrings, bracelets, and necklaces each need a different pose to shine. For rings, I ask the model to touch their face softly or hold something — this brings attention to the fingers. For earrings, a side angle or a slight head tilt does the trick.
Layered necklaces work great with a forward-facing pose and a soft neckline. I avoid clutter. The key is to let the jewlery speak 📸.
Facial expressions should stay simple. A soft smile or relaxed lips works better than dramatic expressions. Jewlery looks best when the focus stays on it, not a model’s exaggerated pose.
If you’re going for lifestyle shots then try editorial jewlery photos that show real moments, Such as your model laughing or adjusting a strand of hair. These images sell the lifestyle, not just the product.
Using Hands and Facial Expressions
I always say: eyes lead the viewer. Ask the model to glance at the jewlery. This guides attention naturally. I also use hand gestures like tucking hair behind the ear to show off earrings, or gently holding a pendant to highlight a necklace.
For mood ideas, I love pulling from vintage jewlery photo shoot moodboards like these. They give you a visual direction and help you create a vibe.
A soft gaze, a delicate hand gesture, or even closed eyes can add emotion to the shot. It’s amazing how a small change in posture can shift the whole image.
Capturing the jewlery’s Texture and Shine
If you’re shooting older pieces like Native American silver jewlery then focus on texture. I use side lighting to bring out the grooves and handwork.
I like to shoot close-ups where jewlery touches skin. This human contrast makes the piece feel more real. Macro lenses help here — you get detail without losing clarity.
Skip the fake sparkle filters. If you light your shot right, the jewlery will shine naturally ✨. A simple softbox or good daylight works wonders.
Check the top professional eCommerce and jewlery image editing services
Part 4: Editing and Post-Processing Like a Pro
Basic Retouching Tips for Jewlery on Models
In post-processing, my first rule is: don’t overdo it. I keep skin clean but real. A few blemishes are okay. People relate more to real skin than airbrushed faces.
Next, I sharpen the jewlery — especially edges. I slightly boost clarity and contrast so stones pop. When working on old crystal jewlery photos, I raise highlights gently to bring back the glow.
Creating a Consistent Look
Whether I shoot modern or vintage styles, I try to keep my edits consistent. For luxury vibes, I use soft gold tones. For modern looks, I keep things crisp and neutral.
Black and white photos of jewlery can be dramatic. But I use them when I want to focus on shape and form instead of color.
Just be careful not to push it too far. Over-edited images may look pretty but they won’t sell well online.
Preparing Photos for Web and Social Media
Each platform needs different crops. Instagram loves squares. Pinterest does well with verticals. For eCommerce, like Shopify, I shoot with space around the jewlery for cropping later.
Save your files as JPEGs for web. Keep file sizes under 300KB if possible, but never sacrifice clarity. I also use clean product shots with a white jewlery stand for photos. Especially before and after the model shots in galleries.
 3")
Part 5: Themes, Styles, and Inspiration
How to Plan an Editorial Jewlery Photo Series
Planning an editorial series helps your shots look connected. I start with a mood or a story like a vintage summer in Italy or a moody winter shoot.
Try searching exclusive jewlery Cleveland photos for ideas from local creators. They’ve got beautiful inspiration from styled indoor and outdoor shoots.
When you shoot with purpose, you go beyond basic product images. You create something people want to share.
Recreating Historical and Cultural Styles
When I work with cultural pieces like ethnic jewlery necklaces, I do research. I want to show respect and beauty at the same time.
Old Native American silver jewlery photos remind me to highlight history, not just shine. I often shoot these in natural light with warm tones, using neutral fabrics like linen or wool.
These shots feel powerful because they tell a story.
Experimenting with Lighting and Mood
Lighting changes everything. I love shooting jewlery during golden hour — it adds natural warmth. Candlelight or deep shadows can add drama.
For black and white shots, I use strong directional light. This makes the image feel bold and emotional.
One of my favorite ideas? A vintage jewlery photo shoot with moody shadows and velvet backgrounds. It looks timeless and feels real.
Check out the easy steps to take jewelry photos and videos
Mistakes to Avoid while Taking Photos of Models in Jewlery
Common Beginner Mistakes in Jewlery Model Photography
I’ve made all the beginner mistakes. Sometimes I forget to focus on the jewlery — and the model ends up sharper than the ring 😅.
Or I pick a background that fights with the product. Bright clothes or messy props steal attention. Another one? The model wears something that overpowers the jewlery.
Keep it simple. Let the piece shine.
Fixing Composition and Framing Issues
If the shot feels weird, check your crop. Don’t go too wide or too tight. Never cut off part of a necklace or earring unless it’s intentional.
Use the model’s hands, face, or clothing to guide attention toward the piece. Think of it like a spotlight. You’re guiding the viewer’s eyes.
What to Avoid in Retouching jewlery Photos
Don’t smooth skin too much — it looks fake fast. Avoid removing all texture.
If the sparkle disappears in editing, pull back on shadows and bring up whites instead.
Also, avoid dumping AI filters on everything. Manual edits are still the best way to keep jewlery looking like, well… jewelry!
Conclusion
So, that’s my guide on how to take photos of models in jewlery — from posing to editing to avoiding the usual mistakes.
You don’t need a fancy studio. All you need is some light, a clear vision, and a little patience.
Tag us on Instagram with your shots or send them my way — I’d love to see what you create!